Quick Takeaways
- ✓ Always confirm rising damp with a PCA-accredited surveyor.
- ✓ Chemical DPC is the go-to fix for most older homes.
- ✓ Remove and replace salt-contaminated plaster after treatment.
- ✓ Check and fix drainage, gutters, and high ground levels outside.
- ✓ Use breathable materials — no vinyl paint or gypsum plaster.
Rising damp is a type of dampness that moves up from the ground into masonry walls and floors using capillary action.
It’s prevalent in older houses that were constructed without a damp-proof course (DPC) or where the DPC has broken down.
In this guide, you will learn how you can cure rising damp in an old house by identifying its signs, understanding its causes, and exploring effective treatment methods.
Whether you’re a homeowner or renovator, this guide will help you tackle the issue and protect your property from further damage.
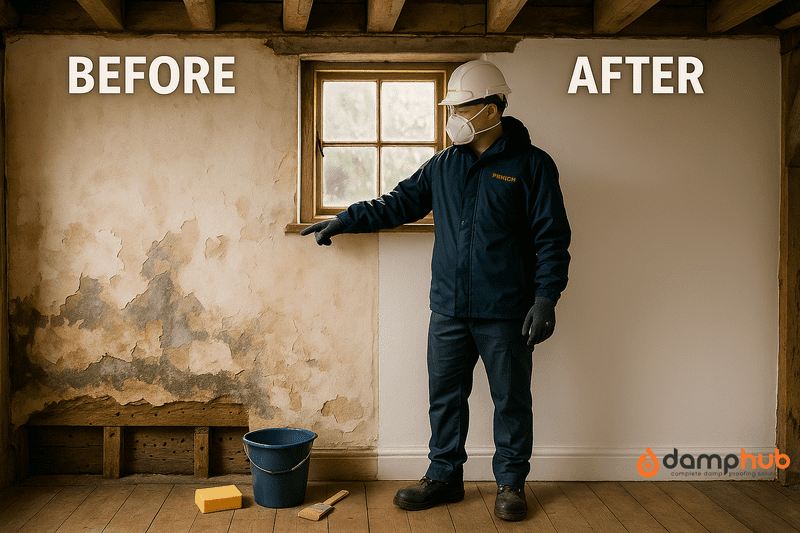
1. Identify the Signs of Rising Damp
Before treating rising damp, proper identification is essential.
Misdiagnosis can lead to unnecessary or ineffective treatment.
Common indicators include:
- Internal wall damp patches, particularly up to around 1 metre high
- Tide marks from ground salts left as water evaporates
- Peeling wallpaper, bubbly paintwork, or discoloured plaster
- Mould growth along the floor areas
- Crumbly or damaged skirting boards and plaster
- Musty odours and colder-than-normal walls in specific areas
- Use of a moisture meter to measure internal wall dampness
Tip:
Only rising damp affects walls in contact with the ground and is usually limited to the bottom half. If damp appears higher up or on ceilings, the likely culprits are condensation or penetrating damp.
📄 RICS Guide to Diagnosing Damp (PDF)
2. Verify the Diagnosis with a Specialist
To avoid costly mistakes, have a damp professional confirm whether it’s truly rising damp.
Steps:
- Hire a PCA-accredited (Property Care Association) damp surveyor
- Request a comprehensive report including moisture profiles and salt analysis
- Look for nitrate and chloride salts — reliable indicators of rising damp
- Ensure surveys include external elements (e.g. ground levels, gutters) as well as interior checks
Example:
A homeowner noticed damp on lower walls in a Victorian house. A PCA surveyor diagnosed a burst pipe — not rising damp. This accurate assessment saved thousands.
🔍 Find a Certified Damp Surveyor – PCA
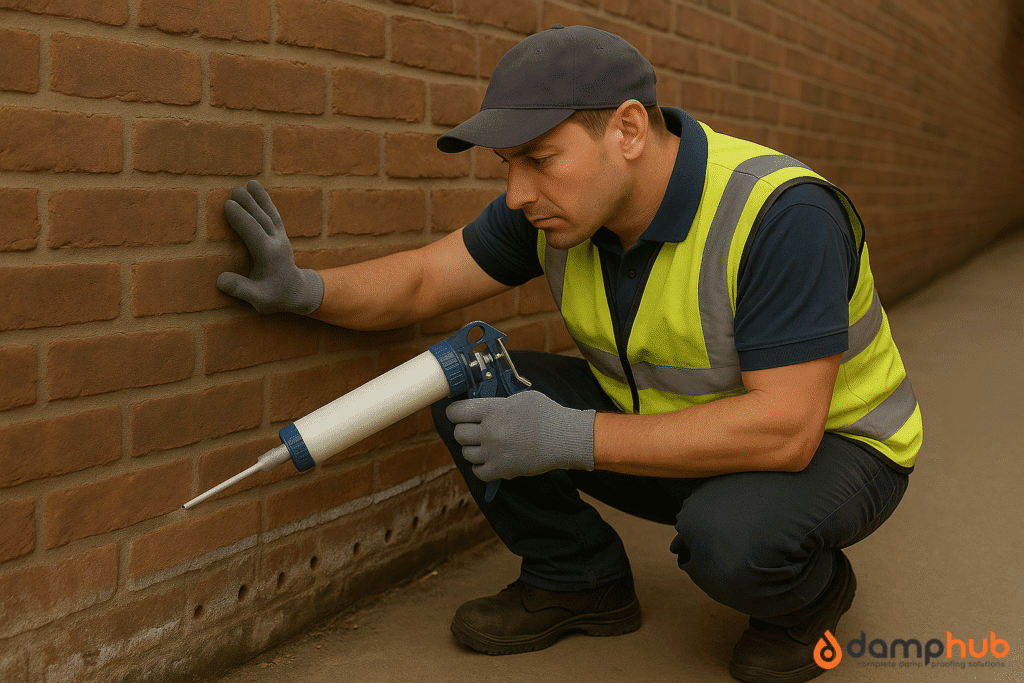
3. Select the Appropriate Rising Damp Treatment Method
Once diagnosed, choose the most suitable rising damp treatment based on the building’s age, structure, and conservation status.
A. Chemical Damp-Proof Course (DPC)
- Cream or liquid is injected into drilled mortar lines (typically 150mm above ground)
- Forms a water-repellent barrier
- Often followed by plaster removal and replacement with salt-resistant materials
Good to Know:
The most common treatment for modern and older homes that aren’t conservation-protected.
👉 Also read: Blog How to Treat Rising Damp: A Complete Guide for UK Homeowners
B. Physical Damp-Proof Course
- Physical barrier (e.g., slate, lead, plastic membrane) inserted into the wall
- Involves dismantling and rebuilding part of the wall
- Long-lasting but invasive and expensive
Good to Know:
The most common treatment for modern and older homes that aren’t conservation-protected.
C. Electro-Osmotic Damp-Proofing
- A tiny electric current repels moisture inside the wall
- Electrodes are installed and connected to a power source
- Less invasive but not suitable for all wall types
Tip:
Ideal for properties where drilling would compromise historical detail.
👉 Must read: Is Rising Damp Dangerous
4. Demolish and Replace Salt-Corrupted Plaster
Even with a DPC, leftover salts can draw moisture from the air.
- Strip away affected plaster up to 1 metre above the last visible damp
- Use salt-resistant base plaster or apply a waterproof membrane
- Finish with breathable or lime-based plaster products suited for older homes
Tip:
Avoid gypsum-based plasters — they’re not breathable and can worsen future problems.
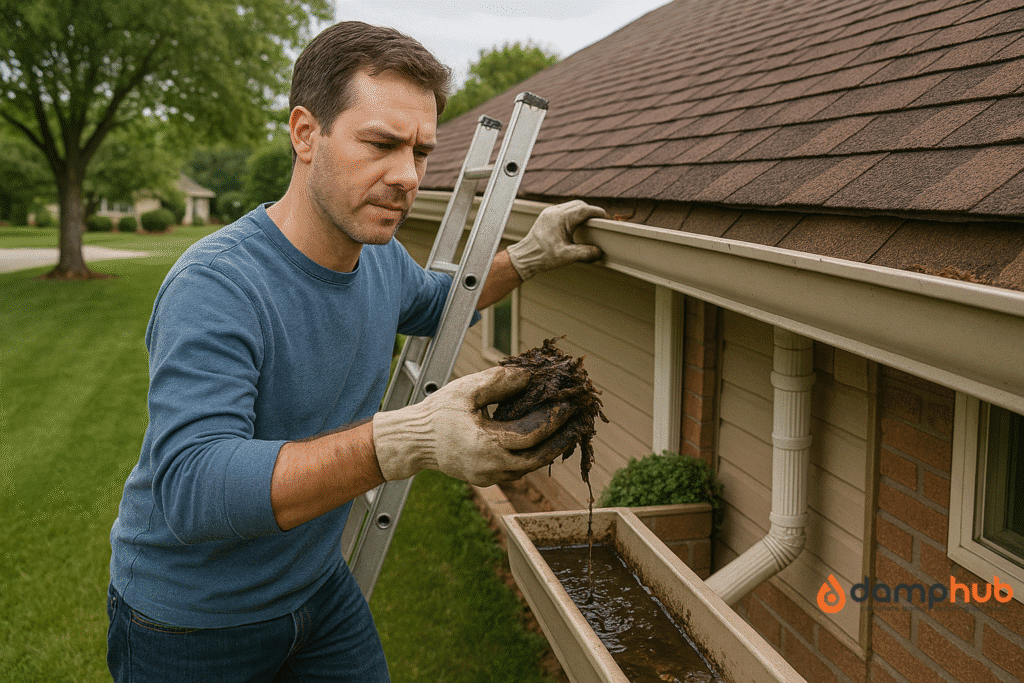
5. Resolve External Drainage and Ground Problems
External factors can aggravate or even cause rising damp. Always treat these alongside internal repairs.
- Lower ground levels if they’re higher than interior floors
- Ensure downpipes and gutters are unclogged and functional
- Install French drains to deflect water from the walls
- Check for leaking taps, drains, or overflowing water butts
Example:
A Georgian terrace suffered damp until the adjacent flower bed was lowered and gravel edging installed to block moisture ingress.
🌧️ UK Government Flood and Drainage Guidance
6. Enhance Internal Ventilation and Heating
Poor airflow can lead to condensation build-up, which is often mistaken for rising damp, or can even make existing damp problems worse.
- Install extractor fans in kitchens, bathrooms, and utility rooms
- Avoid pressing furniture tightly against cold or external walls
- Maintain consistent low-level heating in winter
- Use breathable wall paints (avoid vinyl or modern emulsions)
Good to Know:
Lime-based paints allow moisture to evaporate through the surface — crucial in solid-walled older buildings.
7. Obtain Permission for Listed or Protected Buildings
In conservation zones or listed buildings, structural damp treatments often require official consent.
- Contact your Local Planning Authority (LPA) or conservation officer
- Cement renders or synthetic DPCs may be banned for material incompatibility
- Use heritage-appropriate solutions such as lime render, breathable plaster, and French drains
Example:
A Tudor timber-frame house had lime plaster and breathable insulation installed instead of modern DPCs, due to conservation restrictions.
👉 Must read: Who Can Carry Out a Damp Survey?
8. Regular Maintenance to Avoid Recurrence
Even after treatment, rising damp can return if issues aren’t monitored.
- Clean gutters and drains twice a year
- Check external walls for cracks, bridging routes (e.g. raised soil, decking)
- Repaint every few years using permeable paint
- Monitor internal walls for new patches or returning salt deposits
Tip:
Annual checks are wise — especially during winter when damp is more likely to return.
Summary Table: Damp-Proofing Methods Compared
| Method | Best For | Invasiveness | Cost Estimate | Longevity |
|---|---|---|---|---|
| Chemical DPC | Most properties | Medium | £300–£1,200 | 20+ years |
| Physical DPC | Listed/period buildings | High | £2,000–£5,000 | 50+ years |
| Electro-Osmotic System | Sensitive or hard-to-access walls | Low | £1,000–£2,500 | Variable |
What is the Difference Between Damp and Rising Damp?
Damp is a general term for unwanted moisture in a building. It could come from condensation, leaks, or water getting in through walls or roofs. You’ll often see it as black mould, damp patches, or flaking paint.
Rising damp, on the other hand, is a specific type. It happens when moisture from the ground travels up through brick or stone walls by capillary action. It usually only affects the lower part of walls — up to around 1 metre high — and often leaves tide marks or salt deposits behind.
Quick way to tell?
If the damp is high up or on ceilings, it’s likely not rising damp. If it’s low down and near the floor, especially on older walls, rising damp could be the culprit.
| Feature | General Damp | Rising Damp |
|---|---|---|
| What it is | Moisture from any source | Moisture rising from the ground through walls |
| Common causes | Leaks, condensation, poor ventilation | Lack of damp-proof course (DPC) or failed DPC |
| Where it appears | Anywhere – walls, ceilings, corners | Lower part of ground-floor walls (up to 1m high) |
| Key signs | Black mould, peeling paint, damp smell | Tide marks, salt deposits, crumbling plaster |
| Typical fix | Improve ventilation, fix leaks | Install or repair DPC, replace salt-damaged plaster |
| Common in | All properties | Mainly older houses with no or damaged DPC |
Conclusion
Rising damp is a serious issue in older homes, but it’s entirely manageable with the right approach.
Blend expert insight with an appreciation for your building’s historical context.
Avoid short-term fixes and favour sustainable solutions guided by experienced professionals.
Quick Recaps
- ✓ Know the signs – Low wall damp, tide marks, flaking paint.
- ✓ Get it confirmed – Use a PCA-accredited damp surveyor.
- ✓ Pick the right fix – Chemical, physical, or electro-osmotic DPC.
- ✓ Treat inside & out – Replace plaster, sort drains, lower ground.
- ✓ Prevent a comeback – Ventilate, check yearly, use breathable materials.
FAQs
How to fix a failed damp proof course?
First, don’t assume it’s a weekend DIY job. A failed DPC (damp proof course) often needs specialist repair.
You’ve got a few solid options:
–Chemical injection — the most common fix. A waterproof barrier is pumped into the bricks.
–Electro-osmosis systems — more technical, using electrical currents to repel moisture.
–Damp membranes or tanking slurries — good for internal walls when the damage is more severe.
Pro tip: Make sure the cause of the failure is sorted too — blocked cavities, high external ground levels, or dodgy guttering can all keep defeating even a new DPC.
How long should a damp proof course last?
If it’s done right, you’re looking at at least 20 to 30 years, often more.
Older physical DPCs (like slate or bitumen layers in Victorian houses) can last much longer, but they’re not immune to problems.
Modern chemical ones should hold up well, but bad workmanship or external issues (like soil bridges or leaks) can cause early failure.
If you’re spotting damp under the skirting 10 years after a DPC was installed… It’s worth checking whether it was installed properly — or whether something else is going on.,
What are the signs of damp course failure?
It usually shows up low down on internal walls. Look for:
-Peeling paint or bubbling plaster
-Tide marks or brown stains
-Flaky skirting boards or rusted nails
-A musty, earthy smell that won’t shift
-The wallpaper is coming away near the floor
Good to know: If it feels like it’s always cold and clammy in one corner of the house — even in summer — don’t ignore it.
How can I check my damp proof course?
First, find it. On most homes, the DPC is a thin black line about 15cm (six inches) above ground level, usually visible in the brickwork.
Now check:
-Are there flower beds, driveways, or paving touching it or covering it?
-Has render or plaster bridged over it?
-Is the wall wet just above or below it?
You can also get a damp meter to check moisture levels inside — but a proper damp surveyor will give you a clearer picture. Especially if you’re about to fork out for repairs.,
What happens if rising damp is left untreated?
It spreads. Slowly, but surely.
Plaster crumbles. Timber starts to rot. Mould creeps in. And eventually, the room feels colder, the air feels heavier, and the damage gets harder (and pricier) to fix.
Worst case? You’re dealing with structural issues or fighting off wet rot in your floor joists. All because moisture was allowed to climb and settle in.
Does rising damp go away on its own?
Short answer? No.
Moisture doesn’t just politely leave. If water’s wicking up through your brickwork because there’s no barrier stopping it, it’ll keep going until it hits something that blocks it, or evaporates into your room.
You might not see it in summer, but it’ll come roaring back with the rain and cold.
How long does rising damp take to dry out?
After fixing the source? Roughly 1 month per inch of wall thickness is a general rule.
So, if your wall’s 9 inches thick, expect 9 months.
You can speed things up with good ventilation and heating, but patience is key. Slapping paint over it too soon will just trap moisture — and the problem will bubble back.,
Does rain make rising damp worse?
Indirectly, yes.
Rising damp isn’t caused by rainwater soaking the wall from above — that’s penetrating damp.
But if rain leads to waterlogged soil, and your DPC is damaged or missing, then yes — the more moisture at ground level, the harder your wall works to stay dry.
Blocked drains and poor ground drainage only make things worse.
What can be mistaken for rising damp?
Lots of things mimic rising damp, which is why misdiagnosis is so common:
–Condensation – Often confused when it settles low down.
–Leaks from plumbing, especially near kitchens or bathrooms.
–Penetrating damp – from cracked walls or leaking gutters.
–Bridging – where plaster, render, or soil touches the DPC and bypasses it.
Try this: Always check outside the wall first. A dripping overflow pipe or downpipe crack could be the real culprit.
Can you treat rising damp without removing plaster?
Not properly.
Old, salt-contaminated plaster has to go — it holds onto moisture like a sponge and keeps attracting it back.
You might delay the issue by drying and sealing, but unless you remove and replace the affected plaster with a salt-resistant backing, you’re just covering up the damage.
It’s messy, but it’s necessary if you want a proper fix.
