Picture this. It’s been raining for days. You walk into your living room and spot a strange little patch on the ceiling. Damp. Slightly darker than the rest. Harmless-looking. You think, “Eh, probably nothing.”
Except—it is something. It’s water ingress. And it never shows up shouting.
Water sneaks in quietly. It doesn’t stay where it lands. It creeps. Through plaster. Behind paint. Into timber. It rusts things. Warps things. Fuels mould. And if you give it time, it’ll slowly tear your home apart from the inside.
Most people don’t notice it until it’s way too late.
This isn’t scare-mongering. This is the kind of thing you want to catch early—before the peeling paint, before the rotting floorboards, before the repair quotes make your jaw drop.
Here’s what we’ll go through:
- Where water sneaks in from
- What signs to look for (even the sneaky ones)
- How it’s different from other damp problems
- What happens if you ignore it
- How to stop it from starting again
- How to fix it properly, step by step
- When it’s time to stop DIY-ing and call someone in
Let’s get into it.
How Does Water Ingress Happen?
Water doesn’t need much. A crack. A gap. A blocked drain. And boom—it’s in. It’s patient. It’s persistent. And it always finds the easiest path.
Cracked Brickwork & Mortar That’s Given Up
Bricks aren’t just bricks. They’re porous. Especially old ones. Over time, the mortar between them breaks down. Tiny cracks form. Doesn’t seem like a big deal. But they suck up rain like sponges.
If your walls don’t have a cavity (many homes before the ‘60s don’t), water moves straight through to the inside. And winter makes it worse. That water freezes in the cracks. Then it expands. Come spring, you’ve got bigger gaps than before.
Soon enough, you’re dealing with paint that won’t stick or a musty smell that never quite goes away. A quick bit of repointing could’ve saved you a heap of stress.
Roof Tiles or a Bit of Bent Flashing
You can’t see your roof most days. Out of sight, out of mind. But that’s usually where the trouble starts.
A slipped slate or missing tile doesn’t look like much from the ground. But rain gets in. It slides under the gap, trickles down into the loft, and starts soaking beams or insulation.
By the time you see stains on the ceiling, it’s been there for a while. Roof valleys, chimney flashings, skylight edges—every little detail matters. When seals go brittle or tiles shift, that’s an open invitation for water.
👉 Related Blog: What is Rising Damp – A Complete Guide
Window and Door Frames That Leak Around the Edges
Frames settle. They move. And over time, the sealant around them cracks or peels off. Water doesn’t need a lot of space to get in—it’ll find the tiniest gap.
And once it does, you start seeing damp patches on the inside wall. Sills start swelling. Plaster crumbles. Mould loves to pop up here. People often paint over it, thinking it’s sorted. It’s not.
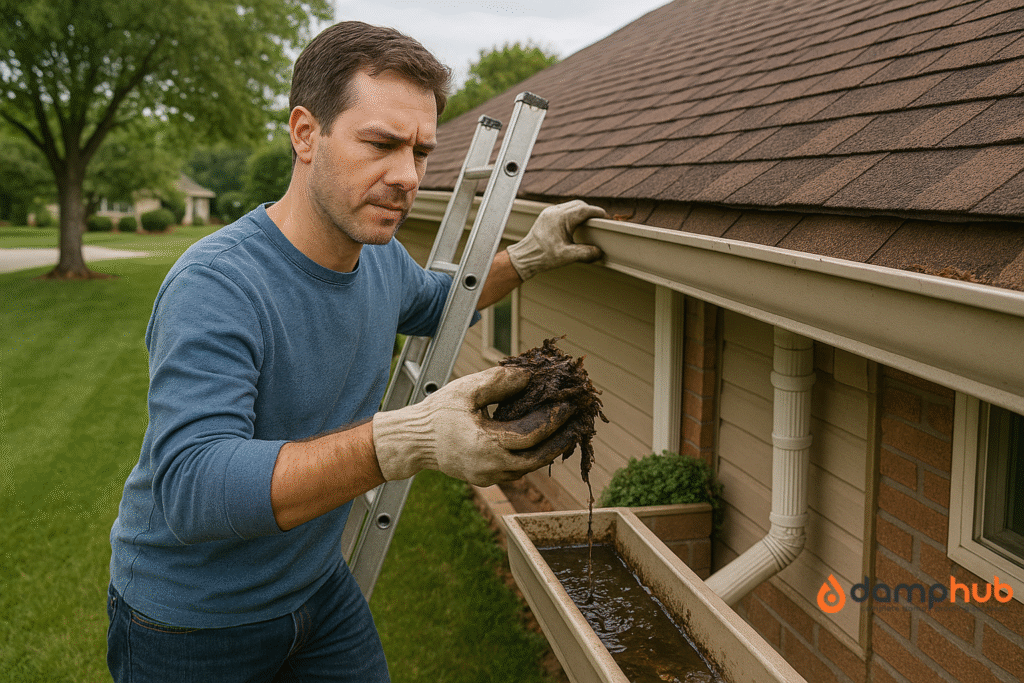
Gutters That Overflow and Downpipes That Back Up
Clogged gutters are like ticking time bombs. The water has to go somewhere, and if it can’t drain properly, it spills over the edge. Down your wall. Over and over.
That constant overflow forces water into hairline cracks. And when downpipes are blocked, water pools around your foundations. Over time, that moisture finds a way into your home.
This is one of those things that’s easy to ignore—until it turns into a nightmare.
Basement Walls That Can’t Handle the Pressure
After a heavy rain, the soil around your basement gets waterlogged. That soaked-up soil pushes hard against your basement walls. It’s like putting a sponge in a vice—eventually, the water squeezes out and into your space.
This pressure is called hydrostatic pressure. If your walls or floor have any weaknesses—cracks, porous bits, old patches—it’ll find its way in. Paint alone won’t hold it back.
You need proper drainage. Or a basement tanking system that’s built for the job.
Flat Roofs That Let Water Sit Too Long
Flat roofs don’t shed water the way pitched ones do. If the drainage is poor, puddles form. And if that happens regularly, even the tiniest defect can turn into a problem.
Eventually, you’ll spot yellow patches on the ceiling below. Flaking paint. Soft plaster. You get the picture.
How Do You Detect Water Ingress Before It’s Too Late?
Water ingress doesn’t kick down the door. It taps on the window. Quietly. Repeatedly. Until one day, you realise you’ve got a real issue.
So, what should you be watching for?
- Patches on the ceiling that show up and disappear. Especially after it rains. They vanish when it dries out. But they’re trying to tell you something.
- Paint that bubbles, peels, or flakes. Moisture’s trapped underneath.
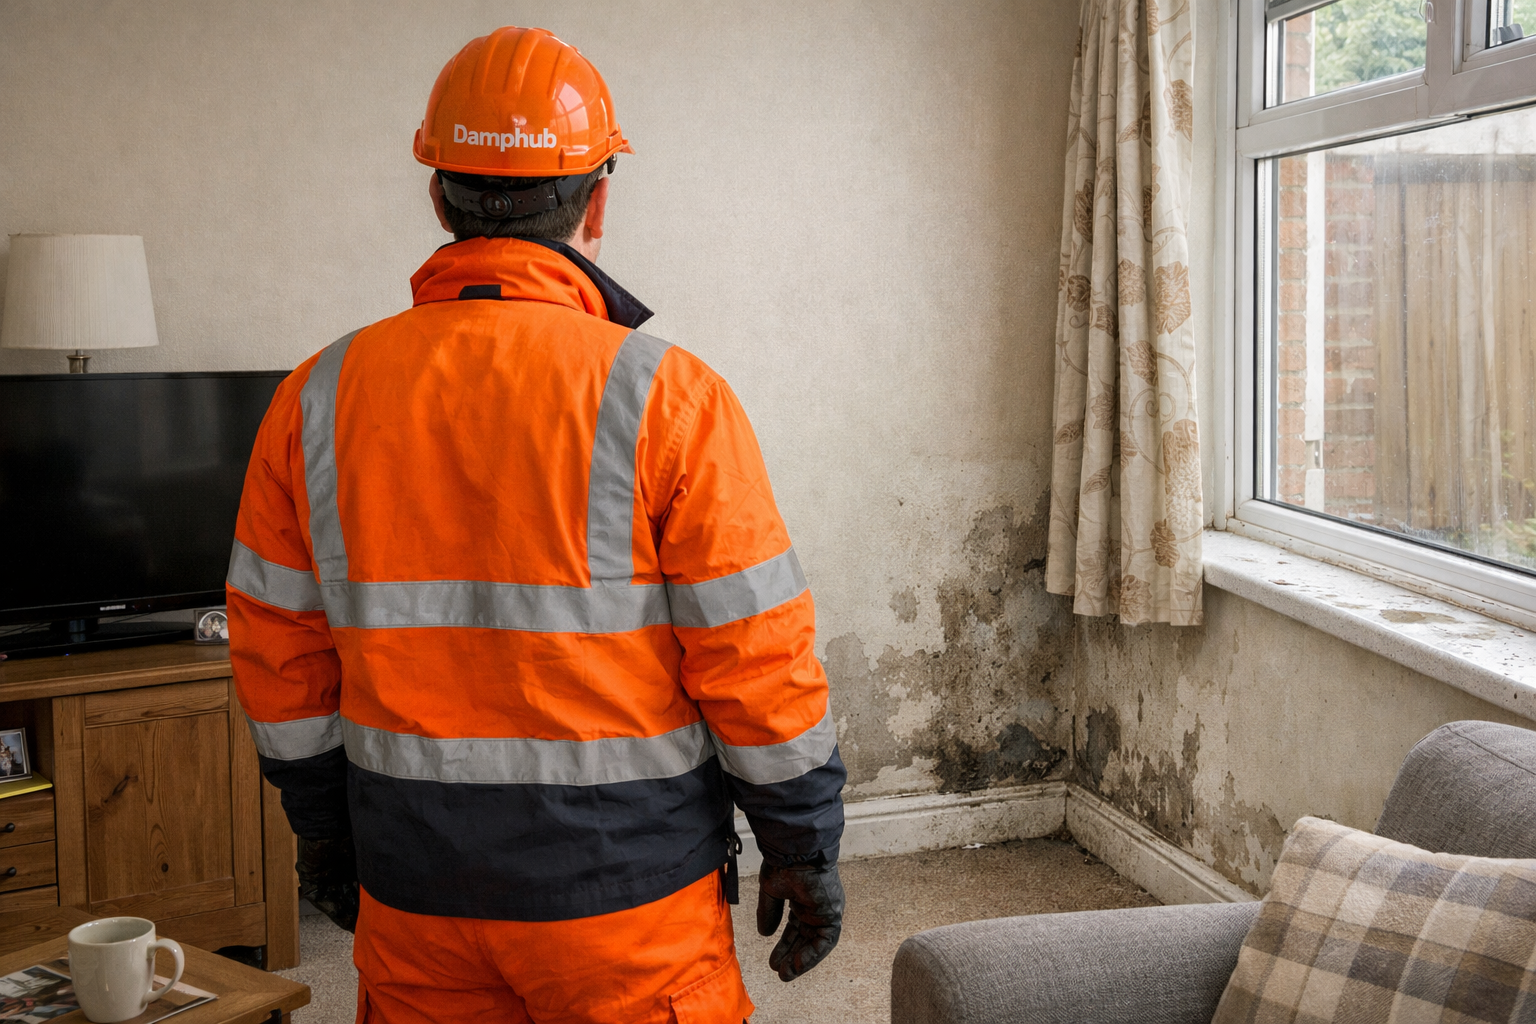
- A white, dusty crust on brick or plaster? That’s efflorescence—salts pushed out by evaporating water.
- Mould forming in corners or along outside walls. That’s moisture hanging around longer than it should.
- You notice an unpleasant smell. Yes, damp smells this way. Once you notice it, you can’t un-smell it.
- Rusty screws, nails, or fixings. They’ve been wet for a while.
- Warped wooden flooring. Sagging ceilings. That means the water’s been at it for long enough to affect the structure.
- Water pooling in your basement or along your exterior wall. Usually, a sign that there’s pressure from outside forcing it in.
If you notice just one of those warning signs, it’s time to act. Don’t wait for confirmation, as it can escalate into more trouble.
Water Ingress vs Damp vs Condensation—Let’s Not Mix Them Up
These terms get thrown around like they’re all the same. They’re not.
- Water ingress is about water getting in from outside. Through your roof, walls, or ground.
- Rising damp happens when water travels up from the ground through your walls, often because there’s no damp-proof course or it’s failed.
- Condensation is homegrown. Steam from your shower, kettle, or drying laundry that settles on cold walls and windows.
All three are annoying. But they need different fixes. Don’t go painting anti-mould paint on a wall that’s wet from the outside. It’ll just peel.
👉 Related Blog: How to Damp Proof a House: 7 Practical Tips from Industry Experts
What Happens If You Ignore Water Penetration?
Water ingress doesn’t stay in one place. It spreads. Quietly. And the longer you leave it, the more damage it does. Here’s how it chips away at your home—and your wallet.
Mould Moves In
You don’t always see it straight away. But it shows up eventually. In corners. Behind furniture. On ceilings. Mould thrives on damp, and it spreads fast.
And we’re not just talking about ugly stains. Mould spores trigger asthma, allergies, and respiratory problems, especially for kids and anyone with breathing issues. It’s not something you want lurking behind your wallpaper.

Timber Rot
Floorboards. Joists. Window frames. Any timber that stays damp starts to rot. And rot isn’t something you just scrub off. It means cutting out and replacing parts of your home. Over time, entire floors or roofs can weaken.
You might not realise it until your floor sags or your window sticks every time it rains.
Metal Starts to Corrode
Wall ties. Nails. Screws. Structural fixings. Metal doesn’t like damp either. Once rust sets in, it eats away at anything holding your home together. In the worst cases, brickwork can shift because the metal parts inside have crumbled away.
Insulation Stops Working
Wet insulation doesn’t insulate. It just sits there, soaked and useless. Your home gets colder, your heating bill climbs, and nothing feels cosy anymore. All because of water silently creeping where it shouldn’t be.
Foundations Start Shifting
In some cases, especially after long wet spells, the soil around your house swells and shifts. That movement puts pressure on foundations. It might start with hairline cracks. Then the wider ones. Then uneven floors.
If ignored long enough, this becomes structural work. And it’s expensive.
Which Parts of the House Are Most at Risk?
Some parts of a home just get hit harder. That’s not because your house is poorly built—it’s just how exposure works. Water penetration takes the easiest route. And some spots are just more inviting.
Roof and Loft
If your roof’s got a missing tile or two, you might not know until the damage has already settled in. Most of us don’t check the loft often. But that’s usually where things start.
A single cracked tile, worn flashing around a chimney, or a blocked valley can let water in. Drip by drip, it soaks the insulation. The rafters get damp. You notice the patch on the ceiling… eventually. And by then, it’s not just cosmetic.
Gutters and Downpipes
Gutters aren’t glamorous. But they matter. If they’re full of leaves or broken, they stop doing their one job—getting water away from your walls.
Overflowing water trickles down the outside of your home, over and over. That repeated soaking finds its way through render, into mortar joints, or worse, down into your foundations.
Blocked downpipes are another hidden culprit. If they can’t send water down the drain, that water goes sideways or pools at ground level. Guess what’s right next to that puddle? Your walls.
External Walls
Old bricks, cracked render, flaky paint—it’s all fair game for rainwater. Solid walls (no cavity) make things worse. Once water penetrates in, it travels inward. Slowly. Silently.
Pipes coming through the wall? They can leave gaps. A dodgy TV cable installation? That tiny hole might be enough. It doesn’t take much.
Windows and Doors
Frames age. Sealant shrinks. A hairline gap appears, and water’s already poking its nose in. It runs down behind plasterboard or soaks into the sill.
You don’t see it at first. But then the wallpaper starts lifting. Or mould appears in that same corner every winter. That’s water talking.
Basements and Cellars
If you’ve got one, you know the struggle. These spaces sit below ground level. Which means water wants in. After heavy rain, the surrounding soil is basically pressing against the walls, trying to squeeze through.
If there’s no proper tanking system or the membrane’s been breached, water shows up. Slowly, maybe. But persistently.
👉 Related Blog: How to Treat Damp Walls Internally: A Step-by-Step Guide
Flat Roofs and Extensions
Flat roofs look tidy and modern, sure. But they can be trouble if the slope isn’t right or the drainage is poor. Water pools. It sits there. Day after day.
And all it takes is one tiny crack in the felt or membrane—and boom, you’ve got a leak dripping into your kitchen extension or garage.
How to Stop Water Ingress Before It Starts
Let’s be honest—no magic spray makes your home permanently waterproof. But regular checks and a bit of maintenance?
That’s how you stay ahead of trouble. Treat it like a car. Service it. Look after it. Don’t wait for something to fall off.
Here’s what helps:
Look After the Exterior Properly
- Check your roof. After big storms, just look. Binoculars work fine. If a tile’s out of place or something looks odd, get someone up there.
- Repoint your brickwork every few years, especially on older homes. If mortar’s flaking or crumbling, water’s already getting in.
- Seal gaps around windows and doors. Old silicone dries out and cracks. Scrape it off and reseal it properly.
- Look at your gutters. If they’re overflowing when it rains, they’re blocked. Clean them out and make sure water’s actually flowing through the downpipes.
- Downpipes should send water away from your house. If it’s just dropping straight down, consider a soakaway or a longer drainpipe that leads away from your foundation.
Basement? Waterproof It Properly
If you’ve got a basement that ever feels damp, don’t ignore it. You’ve got a few options:
- Tanking slurry: This is a thick coating applied to the inside of the basement walls. It keeps moisture out.
- Cavity drainage membranes: These go behind the wall surface and allow any incoming water to be collected and drained away, usually into a sump pump system.
- External waterproofing: Best done during a refurb. This keeps water out from the outside in the first place.
Fix the Drainage Outside
- French drains: These are gravel-filled trenches with a pipe inside, guiding groundwater away from your home.
- Sloping ground: Your garden or yard should slope away from the walls, not toward them. If water pools at the base, that’s bad news.
- Soakaways: Simple but effective. These collect rainwater and slowly release it into the ground, away from your house.
Control the Moisture Inside
Ingress and internal moisture often tag-team. Here’s how to reduce the indoor side of the problem:
- Use extractor fans in bathrooms and kitchens—every single time.
- Open windows when you can. Airflow is your friend.
- Trickle vents in windows help maintain airflow without big draughts.
- Consider a PIV (Positive Input Ventilation) unit if your house is sealed up tight. It circulates drier air and helps prevent condensation.
How to Fix Water Ingress (Not Just Cover It Up)
Alright, so water’s gotten in. You’ve spotted the signs. What now? Don’t reach for the paintbrush just yet; this isn’t about cover-ups. Fixing water ingress properly means going after the cause, not just the symptoms.
Here’s how to handle it step by step.
Step 1: Find the Source
First things first: figure out where the water is coming from. This is the part most people rush—and get wrong. Don’t assume. Don’t guess. Look carefully.
- Check gutters and downpipes during a heavy rain. Are they leaking? Overflowing?
- Peek in the loft for signs of water trails or damp insulation.
- Look at the outside walls for cracks, crumbling mortar, or missing render.
- Use a moisture meter if you have one—it can help narrow down the damp patch to its source.
If you can’t find the entry point, call in a surveyor. Seriously. It’s cheaper than ripping out the wrong wall.
Step 2: Stop More Water from Coming In
Now plug the hole. Whatever let water in—fix it.
- Broken roof tile? Replace it.
- Cracked mortar? Repoint it.
- Gutter overflowing? Unblock it.
- Sealant peeling from a window? Cut it out and reapply.
This is where the leak stops. Without this step, everything else is just decorating.
Step 3: Let It Dry Properly
This part takes patience. Once you’ve fixed the source, you need to let everything dry out naturally. Depending on how long the water’s been there, this might take weeks, not days.
- Open windows.
- Use fans or dehumidifiers.
- Keep the heating on low and steady, not blasting on and off.
You’ll be tempted to repaint immediately. Don’t. If the wall’s still damp inside, the paint will bubble. Let it breathe.
Step 4: Repair the Damage
Once you’re sure everything’s dry, then it’s time to make it look good again.
- Strip off damaged plaster if it’s blown or flaky.
- Treat any areas where mould appeared—even if it’s gone.
- Re-plaster, repaint, or refinish.
If timber got wet—floorboards, joists, skirting—check for rot. If it’s soft or crumbly, replace it. No shortcuts here.
Step 5: Take Preventative Steps for Next Time
Water got in once. Don’t let it happen again.
- Add a French drain or soakaway if the ground slopes toward your house.
- Upgrade guttering or extend downpipes away from the base.
- Repoint old brickwork before it becomes a sponge.
- Install proper ventilation indoors so condensation doesn’t join the party.
And maybe set a reminder on your phone: once every spring and autumn, just walk around your home. Look up, look down. You’ll spot things before they turn into problems.
👉 Related Blog: How Much Does Damp Proofing Cost?
When You Need a Pro (And When You Don’t)
Some fixes you can handle. Others—not so much. And there’s no shame in calling a specialist who does this every day.
DIY Makes Sense If:
- The leak is obvious (e.g. a blocked gutter or missing tile).
- The damage is minor and contained.
- You’re confident doing small repair jobs safely.
Call a Pro If:
- You can’t find the source.
- The damp is spreading or is structural.
- The problem involves basements or tanking systems.
- There’s been mould growth in multiple rooms.
Look for someone who specialises in damp and waterproofing, not just general builders. Ask for a proper survey. And get a written quote, not a vague promise.
Final Thoughts?
Water ingress isn’t dramatic… until it is. Catch it early, and it’s manageable. Leave it, and it becomes one of those stories you tell with a sigh and a receipt folder.
Your home’s like anything worth keeping—watch it, maintain it, and don’t ignore it when it starts acting up.
FAQs
What is the difference between water ingress and egress?
Water ingress refers to water entering a building from outside (e.g. via cracks, gaps, or failed waterproofing).
Water egress is the opposite—it’s water leaving or being drained from a building (e.g. through plumbing or drainage systems).
In short: Ingress = water coming in; Egress = water going out.
How to stop penetrating damp coming through walls
– Identify the moisture entry point (roof, pointing, gutters, etc.).
– Repair external defects—repointing brickwork, sealing cracks, fixing flashing.
– Apply a silane/siloxane-based water-repellent cream to the exterior brickwork to reduce water absorption.
– Internally, remove damaged plaster and use breathable materials for re-rendering if needed.
Crucially: Always fix the source first—internal treatments alone won’t solve active ingress.
How do you waterproof a brick wall from the inside?
– Use cementitious tanking slurry (applied directly to brick/block surfaces).
– Alternatively, install a cavity drainage membrane system (CDM) that redirects water to a sump pump.
– All interior waterproofing must be used in conjunction with identifying and relieving external pressure (e.g. via drainage or external sealing).
Note: Tanking blocks moisture physically; CDM allows controlled drainage.
What are the water-resistant building materials?
– Bituminous membranes (for roofing and foundations)
– Cementitious waterproofing products
– Fibre cement boards (e.g. for wet walls)
– Closed-cell insulation foams (water-resistant by nature)
– uPVC and GRP products (e.g. for cladding, fascias)
– Dense concrete with low permeability
– Porcelain and vitrified tiles (when properly sealed)
How to reduce dampness in a room?
– Improve ventilation (use trickle vents, extractor fans)
– Use a dehumidifier to manage ambient moisture
– Avoid drying laundry indoors without ventilation
– Insulate cold surfaces to reduce condensation risk
– Identify and fix any leaks or signs of water ingress
– In persistent cases, assess for failed DPC or poor ground drainage outside
What is the most common material used as water-resistant wall lining for wet areas?
Fibre cement board (e.g. HardieBacker or similar) is widely used for bathrooms and wet rooms.
It resists moisture, doesn’t degrade like gypsum board, and is compatible with tiling systems.
Other options include:
– PVC wall panels (cladding)
– Wedi boards or extruded polystyrene (XPS) panels for showers
– All must be properly sealed at joints to maintain waterproof integrity.