When you’re dealing with damp, the damp proof material you choose can make or break the job. Some hold up for decades. Others peel, crack, or trap moisture where you don’t want it — especially if you use them in the wrong place.
This guide breaks down the most common materials used for damp proofing in UK homes. Not just what they are, but where they work best, how to apply them, and what to watch out for.
Whether you’re treating rising damp, waterproofing a cellar, or sealing a concrete floor, each product has its place — and its limits.
No hype, no guesswork — just proper information to help you get it right.
👉Please make sure to read: What Is the Best Method of Damp Proofing?
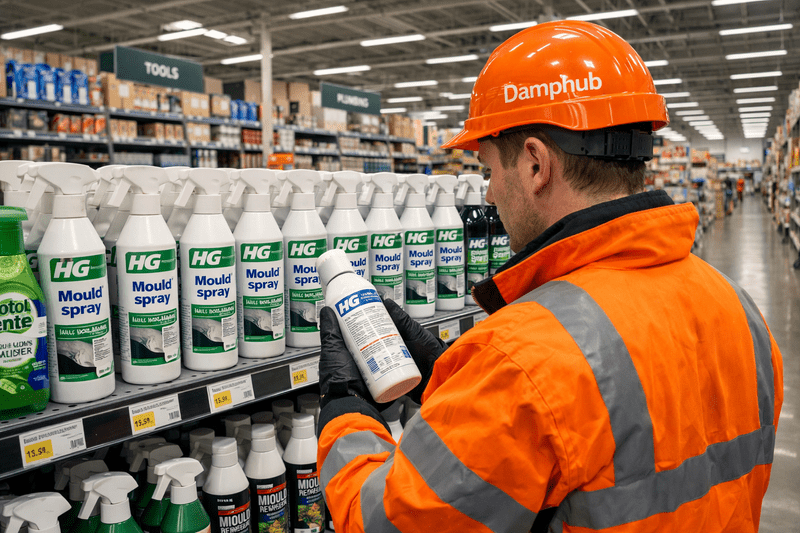
Top 10 Best Damp Proof Materials
1. Bitumen Paint
Bitumen paint is a thick, tar-like liquid that dries to form a tough, waterproof layer. It’s made from asphalt (bitumen) and sticks well to concrete, brick, and metal. Once it’s on, water’s got no way through
Why is bitumen paint good for damp proofing
- It’s cheap and easy to get hold of
- You can slap it on with a brush or roller — no specialist kit needed
- Works a treat on foundations, basement walls, and even old metal pipes
- Once dry, it’s properly water-resistant
Where is bitumen damp proof paint used
- Basement walls
- Retaining walls
- External brickwork near the ground
- Concrete foundations
How to damp proof with bitumen paint
- Make sure the surface is clean, dry, and free from flaky paint or dust
- Use a primer if the manufacturer recommends it
- Apply two coats with a brush or roller — let the first one dry properly before doing the second
- Don’t use it if it’s cold, damp, or raining — it won’t stick well
How long does bitumen damp proof paint last?
You’ll usually get 5 to 10 years out of a proper job, depending on the weather and how thickly it’s applied.
What to watch out for when using bitumen damp proof paint
- It’s not breathable – traps moisture inside walls if there’s damp on the other side
- Can soften in high heat – not ideal for sunny, exposed walls
- It stinks while drying – best to wear a mask and ventilate well
- Don’t paint over it with water-based paints – they won’t stick
💡 Pro Tip:
Bitumen paint is best for below-ground or external walls where breathability isn’t a problem. It dries glossy black, so it’s not exactly pretty — not something you’d want on interior walls.
2. Tanking Slurry
Tanking slurry is a cement-based waterproof coating that you mix with water and brush onto walls or floors. Once it sets, it forms a rock-hard barrier that stops water from seeping through masonry — perfect for keeping basements dry.
Why it’s popular
- Bonds firmly to brick, concrete, and stone
- Works against positive pressure (water pushing in from outside) and negative pressure (from inside leaks)
- Great for basements and cellars
- You can paint over it once dry
Where it’s used
- Cellars and basements
- Underground walls
- Lift pits
- Retaining walls or old foundations
How to apply it
- Dampen the wall first — don’t soak it, just moisten it
- Mix the powder and water exactly as instructed
- Brush on two coats, changing direction for full coverage (e.g. horizontal then vertical)
- Always go floor to ceiling — any gaps and water will find its way in
Lifespan
Expect 10 to 30 years of solid performance if it’s done properly and the surface stays stable.
What to watch out for
- The wall must be clean, sound, and unpainted — old paint or crumbling mortar will ruin the job
- Cracks must be filled before you start
- It won’t stick to painted or sealed surfaces
- You must coat the whole wall — partial coverage = water ingress
💡 Pro Tip:
When waterproofing a basement, never stop halfway up the wall. The slurry needs to go from floor to ceiling in one continuous layer. If not, water will sneak in behind and push the coating off like wallpaper.
👉 Make sure to read: How to Damp Proof a House: 7 Practical Tips from Industry Experts
3. Chemical Damp Proof Course (DPC)
Chemical DPC is a silicone or silane-based cream or liquid injected into brickwork to stop rising damp by forming a water-repellent barrier.
Why it’s popular
- Targets rising damp directly
- Quick to install in most walls
- No visible finish — good for interiors
- Long-lasting when applied correctly
Where it’s used
- Brick or stone walls
- Older homes with no DPC
- Low-level internal walls
How to use
- Drill into the mortar bed at regular intervals
- Inject cream using the applicator gun
- Re-plaster with breathable material
- Allow to cure before decorating
Lifespan
20–30 years if installed and replastered properly.
What to watch out for when using chemical DPC
- Doesn’t work well on rubble or mixed walls
- Must drill into the correct mortar line
- Poor injection depth reduces effectiveness
- Needs correct re-plastering or salt return
💡 Pro Tip:
Always test moisture levels with a damp meter before applying chemical DPC — excessive damp can prevent the cream from soaking in. Once treated, re-plaster with a breathable finish to avoid salt contamination.
4. Liquid Damp Proof Membrane (DPM)
A liquid DPM is a thick, flexible coating (often epoxy or polymer-based) that’s applied to floors to prevent moisture rising from below.
Why it’s popular
- Forms a seamless waterproof barrier
- Good alternative to sheet membranes
- Fast-curing versions available
- Bonds to concrete and screed
Where it’s used
- Concrete floors
- Under wooden or laminate flooring
- Kitchens, bathrooms, utility rooms
How to use
- Clean and degrease the floor
- Prime if needed
- Pour and roll out with a squeegee or roller
- Apply 1–2 coats with a curing time between
Lifespan
15–25 years, depending on product and traffic.
What to watch out for when using liquid DPM
- Surface must be dry and free from dust
- Sensitive to humidity during curing
- Not breathable
- Must match flooring type (e.g. wood, tiles)
🟠 Good to Know:
Some liquid DPMs are suitable for use with underfloor heating, but not all — always check the product spec to avoid compatibility issues.
5. Plastic or Polyethene Sheet Membranes
Plastic sheet membranes are durable rolls of high-density polyethene used under floors or behind walls to block moisture.
Why it’s popular
- Long lifespan
- Easy to install on new builds
- Works well with concrete
- Creates a physical damp barrier
Where it’s used
- Under concrete slabs
- Behind drylining systems
- Under timber flooring
How to use
- Lay over compacted sub-base
- Overlap joints and tape securely
- Continue up wall edges (damp tray)
- Pour slab over or build above
Lifespan
50+ years when left undisturbed.
What to watch out for when using plastic sheet membranes
- Must be taped and sealed correctly
- Vulnerable to punctures during build
- Not suitable for retrofits inside walls
🟠 Good to Know:
When laying plastic sheet membranes, overlap each sheet by at least 150mm, and tape all joints tightly. Make sure the membrane continues up the walls to link with the damp-proof course (DPC) — this stops moisture from sneaking through gaps at floor edges.
6. Cavity Drain Membranes
Cavity drain membranes are studded plastic sheets that create an air gap between damp walls and internal finishes, allowing moisture to drain safely.
Why it’s popular
- Doesn’t block water — redirects it
- Allows walls to breathe
- Minimal wall prep needed
- Common in cellar waterproofing
Where it’s used
- Basement walls and floors
- Retrofit waterproofing
- Damp stone or brickwork
How to use
- Fix the membrane to the wall with plugs
- Overlap and seal joints
- Install a drainage channel on the floor
- Optionally add a sump pump
Lifespan
50+ years if not physically damaged.
What to watch out for when using cavity drain membranes
- Needs a drainage channel or a pump
- Can be costly vs coatings
- Requires sealed installation
💡 Pro Tip:
For the best results, choose a silane/siloxane blend — it penetrates deeper into the brick and provides longer-lasting protection against wind-driven rain.
👉More guide from us: Damp Proofing UK: Costs, Rules, and What You Need to Know
7. Breathable Sealers
Breathable sealers are silane/siloxane-based liquids applied to masonry that allow water vapour out but block rain penetration.
Why it’s popular
- Keeps walls dry without sealing moisture in
- Preserves traditional brick or stone
- Clear finish
- Easy maintenance
Where it’s used
- External brickwork
- Lime render
- Stone walls
How to use
- Clean the surface with a brush or a light wash
- Apply by low-pressure spray or roller
- Allow to soak and reapply if needed
Lifespan
10–20 years, depending on weather exposure.
What to watch out for when using breathable sealers
- Doesn’t stop rising damp
- Reapplication may be needed after harsh winters
- Won’t work on painted walls
💡 Good to Know:
Siloxane-based versions last longer and penetrate deeper than older silicone formulas.
8. Electro-Osmotic DPC
A system that uses small electrical pulses to repel rising water molecules in walls by reversing capillary action.
Why it’s popular
- Ideal for thick stone or rubble walls
- No chemical injection required
- Discreet installation
- Low power use
Where it’s used
- Heritage or listed buildings
- Thick rubble stone walls
- Where chemical DPC failed
How to use
- Insert wires and anodes into the mortar bed
- Connect to the power unit
- Monitor over time
- Usually installed by specialists
Lifespan
20–40 years with a maintained power unit.
What to watch out for when using electro-osmotic DPC
- Needs ongoing low-voltage power
- Slower to take effect
- Not a DIY job
- Can be costly
9. Cementitious Waterproofing
Cementitious waterproofing involves a pre-packed mix of cement-based powder and waterproofing additives. Once mixed with water, it becomes a slurry or mortar that sticks tightly to concrete and masonry surfaces, blocking moisture from passing through.
Why it’s popular
- Bonds exceptionally well to concrete, brick, and blockwork
- Budget-friendly compared to membranes or resin systems
- Common choice for underground areas like basements or tanks
- Can be painted over or tiled once cured
Where it’s used
- Water tanks and reservoirs
- Lift shafts and concrete inspection pits
- Cellars, basements, and retaining walls
How to use
- Mix the powder with clean water according to the instructions
- Apply to a damp (not dripping wet) surface using a brush or trowel
- Always apply two coats, with the second one brushed at 90° to the first
Lifespan
Expect around 10 to 20 years of protection, depending on how much movement or pressure the structure experiences.
What to watch out for
- Needs a solid, stable background — crumbling render or flaky concrete won’t hold it
- Fine cracks in the structure can allow leaks through
- On high-pressure jobs, mesh reinforcement may be needed to avoid failures
💡 Pro Tip:
Always dampen the surface first — not soaking, just misted. Applying cementitious coatings to bone-dry masonry can cause poor bonding and early cracking.
👉More guides from us: 10 Best Damp Proofing Specialists in Cornwall, UK
10. Silicone-Based Masonry Creams
Masonry creams are thick, breathable silicone emulsions that soak deep into brickwork to repel rainwater while still allowing trapped vapour to escape.
For more guidance on the best masonry creams, please read our other guide: 10 Best Waterproof Masonry Paints in the UK
Why it’s popular
- Deep penetration (up to 12mm)
- Maintains natural brick appearance
- Breathable
- UV and frost resistant
Where it’s used
- External brick and masonry walls
- Exposed elevations
How to use
- Clean brickwork thoroughly
- Apply with a brush or roller
- Allow time to soak in and cure
Lifespan
20–25 years
What to watch out for when using masonry creams
- Won’t stop rising damp
- The wall must be dry before applying
- Not suitable for painted or sealed brick
💡 Pro Tip:
For the best results, choose a silane/siloxane blend — it penetrates deeper into the brick and provides longer-lasting protection against wind-driven rain.
How to Choose the Right Damp Proof Material
When choosing the best damp proof material, the trick is knowing what kind of damp you’ve got, where it is, and how your property is built.
This guide breaks it down simply. No jargon. Just real-world advice.
1. Start With the Type of Damp
Before you even think about the best damp proof materials, you need to figure out what’s actually going wrong.
Rising Damp
This is when moisture travels up from the ground into your walls. You’ll usually see tide marks, salt stains, or flaky paint low down.
Best damp proofing material for rising damp
- Chemical DPC (Product 3),
- Electro-osmotic DPC (Product 8),
- or mortar-injected systems.
Penetrating Damp
Water’s getting in from the outside — through cracks in render, dodgy pointing, or porous bricks.
Best damp proof material for penetrating damp
- Breathable sealers (Product 7),
- Tanking slurry (Product 2)
- or Masonry creams (Product 10).
Basement or Below-Ground Damp
If the wall or floor is underground, moisture can push through from the soil outside.
Best Damp proof material for below-ground Damp
- Tanking slurry (Product 2),
- Cavity drain membranes (Product 6), or
- Cementitious coatings (Product 9).
Damp Floors
If moisture is coming up through a concrete floor, it’s usually because there’s no damp-proof membrane underneath.
Best damp proof material for damp floors
- Liquid DPM (Product 4),
- or Plastic sheet membranes (Product 5).
👉 Please also read: What is the Difference Between DPC vs DPM?
2. Check What You’re Working With
The surface makes a big difference to what damp proof material will actually stick and last.
- Painted or sealed surfaces? Tanking and cement coatings won’t grip unless you strip it back to bare brick or concrete.
- Crumbling or rubble-filled walls? Avoid chemical DPC. You’ll be better off with an electro-osmotic system or a membrane.
- Need the wall to breathe? Don’t use bitumen or plastic-based barriers. Go for breathable products like silane sealers or masonry creams.
3. Match the damp proof material to Your Budget
Some damp proof materials are cheap and cheerful. Others cost more up front but last decades.
Cheaper, DIY-friendly options:
- Bitumen paint (Product 1)
- Chemical DPC (Product 3)
- Breathable sealers (Product 7)
Mid-range with better longevity:
- Tanking slurry (Product 2)
- Liquid DPM (Product 4)
- Masonry creams (Product 10)
Higher cost, longer term:
- Cavity drain membranes (Product 6)
- Electro-osmotic DPC (Product 8)
4. Can You Do It Yourself?
Here’s a rough idea of which damp proof materials you can handle yourself — and which ones need a specialist.
| Damp proof material | DIY-Friendly? | Professional Needed? |
|---|---|---|
| Bitumen Paint | Yes — dead easy | No |
| Tanking Slurry | Yes — but prep matters | Sometimes (basements) |
| Chemical DPC | Yes — if careful | No |
| Liquid DPM | Yes — if the floor is clean | No |
| Plastic Sheet Membranes | Yes — in new builds | Not usually |
| Breathable Sealers | Yes — roller/brush on | No |
| Masonry Creams | Yes — simple to apply | No |
| Cavity Drain Membranes | Not really | Yes — trained installer |
| Electro-Osmotic Systems | No | Yes — needs wiring |
| Cementitious Coatings | Not ideal | Yes — if the floor is clean |
💡 Pro Tip:
There’s rarely just one fix. You might need a chemical DPC and to replaster with breathable materials — or to pair tanking slurry with a drainage channel in a basement. Think in layers, not just products.
🟠 Good to Know:
Some damp proof materials work better in certain types of homes. Solid-walled cottages, for example, need to breathe — so breathable sealers or creams make more sense than full waterproofing.
Answering Questions on the Best Damp Proof Materials
-
What is the most commonly used DPC material?
High-density polyethene (HDPE) sheets and silicone-based chemical creams are the most common DPC materials today.
-
What is the modern DPC material?
Modern DPC often uses injection creams or liquids made from silane/siloxane compounds for easier installation in existing walls.
-
How long does damp proofing last?
Most damp proofing methods last between 20 and 30 years if installed correctly.
-
How much to damp proof a 3-bed house?
Expect to pay between £2,000 and £5,000, depending on the method, wall condition, and whether replastering is included.
-
What is the average cost of damp proofing?
Costs vary depending on your home type and the damp proofing method used. Here’s a breakdown for 2025:
Damp proof membrane (DPM):
– Terraced house: £2,200 – £4,200
– Semi-detached: £3,200 – £5,200
– Detached: £4,800 – £6,200Injection damp proofing:
– Terraced house: £850 – £1,300
– Semi-detached: £1,600 – £2,600
– Detached: £2,400 – £3,200Labour costs:
– Typically £280 – £340, depending on location and complexity
Note: Prices can rise if there’s extensive damp damage, replastering is needed, or restricted access. Always get a proper damp survey first to confirm the right treatment.
For a full guide on cost, please read our detailed post: How Much Does Damp Proofing Cost?
-
How thick should a damp proofing be?
Thickness varies by product — liquid membranes are usually 1–2mm thick per coat, while physical DPC sheets are around 0.5–1.5mm.
-
How to apply damp proof compound on a concrete surface?
Clean and dry the surface, apply primer if needed, then spread the compound evenly with a roller or brush in two coats.
-
Is primer required after damp proof?
No primer is applied before damp proofing if needed. After curing, surfaces can be painted or tiled directly (check product guidance).
-
What is the mixture of water proofing mix to cement?
Typically, 1 part waterproofing additive to 10 parts cement, but always follow the product’s instructions for exact ratios.
-
What are the principles of damp proofing?
Prevent moisture entry, allow trapped moisture to escape, and match the method to the type of damp and building structure.