Quick Takeaways
- ✓ Rising damp starts from the ground and moves up walls via capillary action.
- ✓ It causes tide marks, salt deposits, crumbling plaster, and rotting skirting boards.
- ✓ The most common fix is a chemical DPC injection — fast, affordable, and effective.
- ✓ Proper diagnosis is key — always rule out condensation or leaks before treatment.
- ✓ After treatment, use breathable plaster and improve ventilation to prevent return.
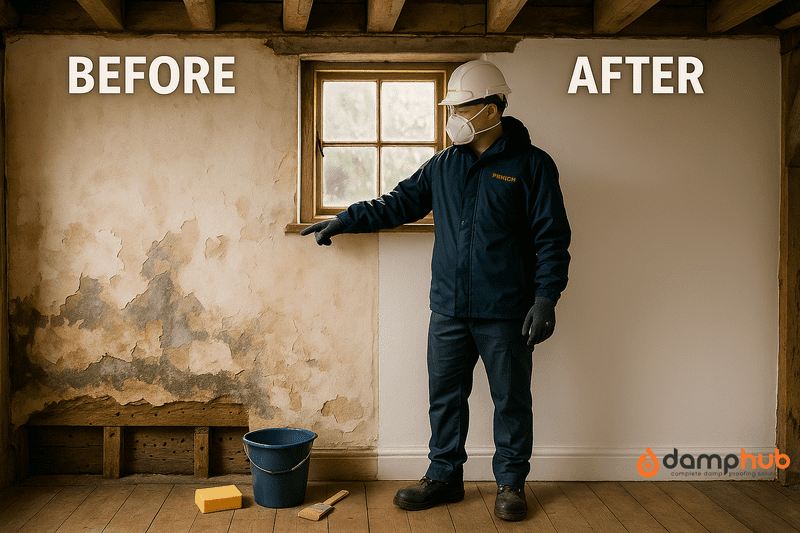
Have you spotted damp patches, tide marks, or a white, powdery residue slowly creeping up from the base of your walls?
These are common signs that many UK homeowners notice, especially in houses built during the 1990s. It’s important not to ignore them.
Why?
Because most of the time, they point to rising damp — a quiet problem that can cause a lot of trouble if left alone.
Rising damp isn’t just about ugly walls.
Over time, it can damage plaster, paint, and woodwork, and even affect the very structure of your home.
It can make your space less cosy and, sadly, lower your property’s value too.
In this guide, we will help you understand what rising damp is, how to identify it correctly, and explain the most effective rising damp treatment and prevention tips.
Let’s begin.
What Is Rising Damp?
Rising damp is a form of moisture intrusion that originates from the ground. It travels upward through porous materials like brick, stone, and mortar.
This movement is due to capillary action, where water rises through microscopic channels within the wall materials.
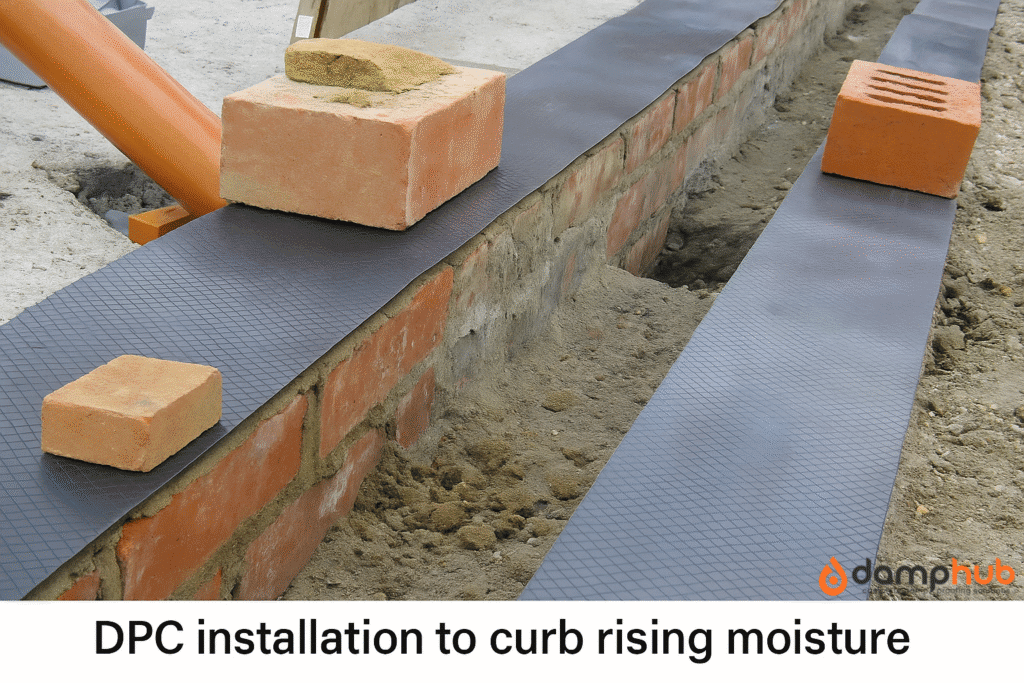
To combat this, most homes are constructed with a damp-proof course (DPC) — a horizontal barrier typically made of slate, plastic, or bitumen felt, installed just above ground level to block rising moisture.
However, this barrier can deteriorate over time or be bypassed by changes to the building’s surroundings.
Homes built before 1950 often lack an effective DPC, making them more susceptible to rising damp. Even newer homes with DPCs can be affected if the barrier is compromised or bridged.
👉 Also read: What is rising Damp – A Complete Guide
Signs of Rising Damp
Rising damp has several distinct visual and physical indicators.
Recognising these early can help observe the right rising damp treatment and prevent further damage:
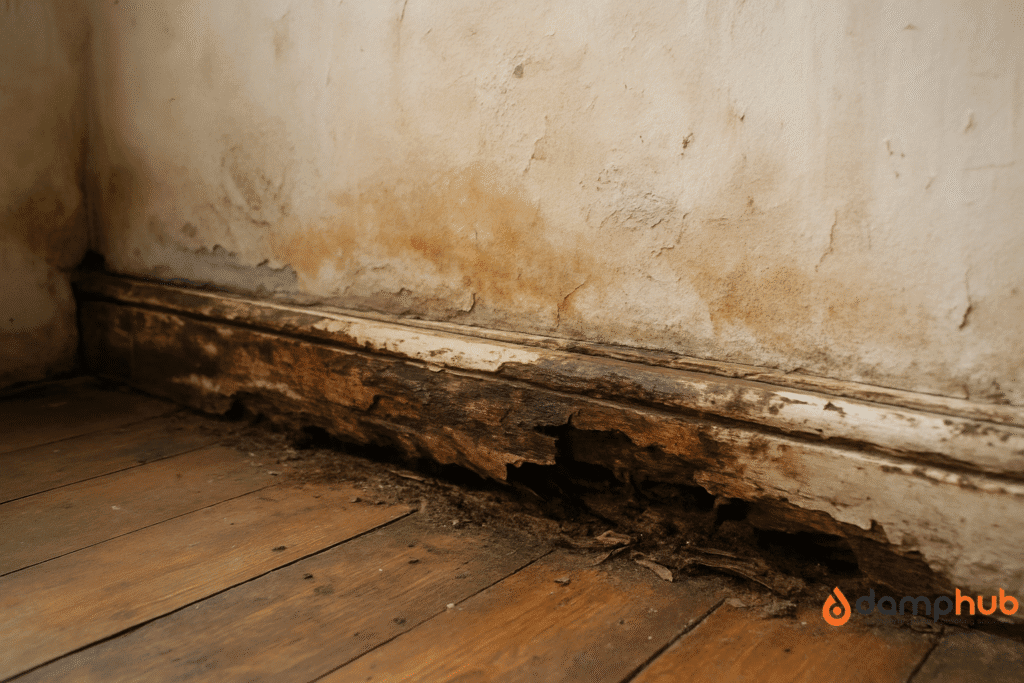
- Tide marks: Horizontal brown or discoloured stains on interior walls, typically up to one metre high
- White salt deposits (efflorescence): Salts from the ground carried upward by moisture, then left on the wall surface
- Flaking or bubbling paint and wallpaper: Moisture disrupts adhesion, causing finishes to deteriorate
- Crumbly or powdery plaster: Dampness weakens plaster, causing it to lose integrity
- Rotting skirting boards or floorboards: Wood in prolonged contact with damp walls may decay
- Damp or musty odours: Persistent moisture fosters mould and mildew growth, producing an unpleasant smell
It is crucial to differentiate rising damp from other types, like condensation (typically affects upper walls or windows) or penetrating damp (caused by external leaks).
A professional damp survey is the best way to confirm the diagnosis.
What Causes Rising Damp?
Rising damp typically occurs due to one or more of the following reasons:
- Lack of Damp-Proof Course: Common in properties built before damp-proofing became standard practice
- Deteriorated or Failed DPC: Natural wear, incorrect installation, or damage from renovations
- Bridged DPC: External ground levels, decking, flower beds, or internal plaster layers that bypass the DPC and allow moisture to rise
- Porous Building Materials: Bricks and mortar with high absorption can draw moisture upward more easily
- Poor Drainage Around Foundations: Water pooling near the house keeps the ground saturated, exacerbating the problem
Understanding the root cause is essential to choosing the right rising damp treatment method.
👉 Related blog: Why Does My Bed Feel Damp?
Rising Damp Treatment: Step-by-Step
Addressing rising damp involves a clear, structured process. The right approach depends on your property’s construction, the extent of the damage, and budget considerations.
Step 1: Confirm the Diagnosis
Before beginning any treatment, hire a qualified surveyor to assess the problem.
A reputable surveyor will:
- Use moisture meters to measure damp levels inside the walls
- Perform salt tests to determine the type of moisture (groundwater vs. condensation)
- Check for external sources like leaking downpipes or bridging materials
A proper diagnosis ensures the treatment plan is suitable and cost-effective.
Step 2: Prepare the Affected Area
Before applying treatment, prepare the area thoroughly:
- Remove plaster, paint, and wallpaper up to at least 1 metre above the highest visible damp
- Expose the bare brickwork or stone to assess structural condition
- Repair external defects like overflowing gutters, cracked pipes, or poorly directed downspouts
- Ensure the area is well-ventilated to aid in drying
This step prevents contamination of new materials and ensures that moisture can escape during and after treatment.
Step 3: Choose and Apply a Rising Damp Treatment Method
There are several proven ways to treat rising damp. The most appropriate solution will depend on the property type and severity of the damp.
1. Chemical Damp-Proof Course (DPC) Injection
The most widely used modern solution for brick-built walls.
How it works:
- Holes are drilled into the mortar bed at regular intervals along the base of the wall (usually 10-12mm wide and 150mm apart)
- A silicone-based cream or liquid is injected into these holes
- The substance penetrates the masonry and forms a water-repelling barrier
Advantages:
- Quick and cost-effective for most homes
- Minimal structural disruption
- Compatible with many wall types
Limitations:
- Effectiveness depends on wall dryness at the time of treatment
- May not work well in very thick or irregular walls (e.g., rubble-filled or stone walls)
Best practice: Use breathable plaster systems and allow time for thorough drying after treatment.
👉 Related blog: How to Damp Proof a House: 7 Practical Tips from Industry Experts

2. Installing a Physical Damp-Proof Course
This is a traditional method and is often used when other treatments fail.
How it works:
- Small sections of the wall are removed at a time
- A new DPC material (plastic sheet, slate, or metal) is inserted into the wall bed joint
- Each section is rebuilt before moving to the next, preserving structural integrity
Advantages:
- Permanent solution
- Ideal for extreme or long-standing damp problems
Limitations:
- Expensive and labour-intensive
- Involves significant disruption
- Not suitable for DIY
3. Electro-Osmotic Damp-Proofing
This high-tech method is ideal for stone or mixed-construction walls.
How it works:
- Electrodes are embedded into the masonry
- A low-voltage electric current is applied
- This repels moisture back down into the ground, reversing capillary action
Advantages:
- Minimal disruption
- Effective in complex wall constructions
Limitations:
- Higher cost
- Requires a continuous low-voltage power source
👉 Related blog: Who Can Carry Out a Damp Survey?
4. Damp-Proof Membranes (Liquid or Physical)
Useful for floors or internal walls where full removal isn’t practical.
How it works:
- A waterproof sheet or liquid membrane is applied to the affected wall
- It blocks moisture from entering internal finishes
- Often used with cavity drainage systems in basements
Advantages:
- The immediate barrier to damp
- Can be used as part of a larger waterproofing system
Limitations:
- Doesn’t address moisture within the wall core
- Often requires professional installation
Step 4: Replaster the Treated Walls
Once the damp-proof course is installed, damaged plaster must be removed and replaced.
Old plaster often contains salts that continue attracting moisture, even after treatment.
Use salt-resistant or renovating plaster, which:
- Prevents salt transfer to the surface
- Is breathable, allowing trapped moisture to escape
- Supports the drying process
Let the walls dry naturally. Drying time varies with wall thickness but usually ranges between 4 to 12 months. Avoid using standard gypsum plaster or vinyl paints during this period.
Tip:
Let the walls dry naturally. Drying time varies with wall thickness but usually ranges between 4 to 12 months. Avoid using standard gypsum plaster or vinyl paints during this period.
👉 Also Read: 10 Best Damp Survey Companies in London
Step 5: Improve External Drainage and Ventilation
Effective treatment must be supported by good building maintenance:
- Keep external ground levels at least 150mm below the DPC line
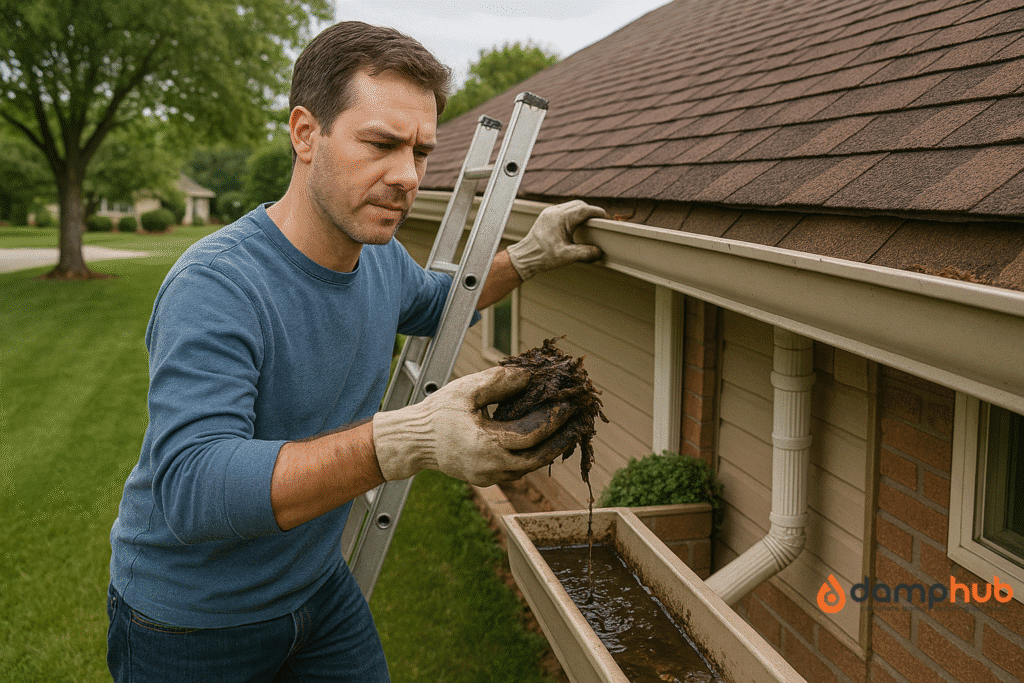
- Ensure the guttering and downpipes are clear and direct water away
- Avoid internal wall coverings that trap moisture (e.g., vinyl wallpaper)
- Install air bricks or mechanical ventilation in poorly ventilated rooms
- Inspect drainage systems regularly to prevent pooling near foundations
These measures help keep your damp-proof system effective long-term.
DIY vs Professional Rising Damp Treatment
While rising damp can be treated using DIY kits, success depends heavily on accurate diagnosis and careful application.
DIY Pros:
- Lower upfront costs
- Kits are widely available and come with instructions
DIY Cons:
- High risk of misdiagnosis
- Incomplete treatment can lead to the return of damp
- No warranty or guarantee
Professional Pros:
- Accurate surveys and diagnostics
- Guaranteed workmanship
- Access to high-grade materials and tools
Tip: Choose contractors registered with the Property Care Association (PCA) or those offering insurance-backed guarantees.
Tip:
Choose contractors registered with the Property Care Association (PCA) or those offering insurance-backed guarantees.
Treatment Timeframes
The total time required varies based on method and property condition:
- Chemical injection: 1–2 days
- Replastering: 2–4 days
- Drying period: 4–12 months (longer in thick or cold walls)
- Physical DPC: 1–2 weeks due to structural work
- Electro-osmotic systems: Installed within a few days
Using industrial dehumidifiers can assist drying, but should not replace natural ventilation.
How Much Does Rising Damp Treatment Cost?
| Treatment Type | Estimated Cost | Notes |
|---|---|---|
| Chemical DPC Injection | £70–£150 per metre | Most common method; cost varies by wall thickness and length. |
| Replastering | £50–£100 per metre | Usually needed after DPC work due to salt contamination in old plaster. |
| Physical DPC Installation | £250–£400 per metre | Rare and invasive; involves inserting a new barrier physically. |
| Electro-osmotic System | £800–£1500 per wall | Used in properties where standard injection methods are less effective. |
| Damp Survey | £150–£400 (one-off fee) | Cost varies depending on property size, location, and report depth. |
Costs in the UK depend on wall material, method, property access, and region. Typical prices include:
Pro Tip:
Obtain at least three quotes and compare not just on cost but on experience and warranty.
PRO TIP: Obtain at least three quotes and compare not just on cost but on experience and warranty.
👉 Must read: Is Rising Damp Dangerous
Can Rising Damp Return After Treatment?
Yes — and often does if the root causes are not properly addressed:
- Raised ground levels bridging the DPC
- External leaks have not been fixed
- Inappropriate plastering with non-breathable materials
- Poor ventilation or persistent condensation
Preventative maintenance and regular inspections are key to long-term success.
How to Prevent Rising Damp in the Future
After your rising damp treatment, it’s essential to take ongoing steps to protect your home. Here’s what to do:
- Clear your gutters and drains regularly
Check gutters and downpipes at least twice a year, especially after autumn and periods of heavy rain. Remove leaves, moss, and blockages to prevent water from spilling over and seeping into your walls.
- Lower any exterior ground that’s too high
Walk around your property and make sure the ground level outside is at least 150mm (two brick courses) below your internal floor. If it’s too high, dig back the soil or adjust the paving to stop moisture from reaching your damp proof course.
- Avoid using non-breathable paints on internal walls
Avoid plastic or waterproof paints that trap moisture. Instead, choose breathable finishes like mineral paints or limewash that allow moisture to evaporate naturally, helping keep your walls dry.
- Use breathable plaster and render inside
When replastering after treatment, use lime plaster or a specialist renovating plaster. These materials allow residual moisture to escape, supporting the long-term effectiveness of your damp proofing.
- Improve ventilation in moisture-prone areas
Fit extractor fans in kitchens, bathrooms, and utility rooms. Use trickle vents in windows and keep internal doors open when practical to improve airflow and reduce condensation.
Common Myths About Rising Damp
Myth 1: “It’s just condensation.”
Condensation is caused by internal humidity, often affecting windows and ceilings. Rising damp begins at ground level.
Myth 2: “Painting over it solves the problem.”
Paint might mask the stain temporarily, but moisture will continue rising unless the source is treated.
Myth 3: “New homes don’t get rising damp.”
Even newer buildings can experience rising damp if the DPC is bridged or poorly installed.
👉 Related blog: Paint for Damp Walls in the UK
Conclusion
Quick Recaps
- ✓ Rising damp damages more than just walls — it can affect your home’s structure and value.
- ✓ Homes built before 1950 are especially at risk due to missing or failed damp-proof courses.
- ✓ You’ll need to strip back plaster, treat the wall, then replaster with salt-resistant materials.
- ✓ External fixes — like clearing gutters or lowering ground levels — are just as important.
- ✓ Always get multiple quotes and choose damp specialists who offer proper guarantees.
Rising damp is a manageable problem when addressed with knowledge, precision, and proper materials.
The key to successful rising damp treatment is thorough diagnosis, selecting the right solution, and supporting the work with good maintenance habits.
Whether using a chemical DPC injection, installing a new barrier, or improving ventilation and drainage, always prioritise quality workmanship and long-term prevention.
📞 Need Help With Rising Damp?
Rising damp isn’t something to leave for later. The longer it sits, the more it spreads — quietly wrecking your plaster, skirting boards, and even your home’s value.
- ✓ Book a professional damp survey
- ✓ Get tailored advice based on your property
- ✓ Compare rising damp treatment quotes (with no pressure)
Start with the right surveyor — and fix it properly the first time.
FAQs About Rising Damp Treatment
How to treat rising damp in an old house naturally?
Natural rising damp treatment methods include improving ventilation, using breathable lime plaster, installing French drains, and applying salt-resistant renders.
These are less invasive but may not fully solve severe cases.
Can rising damp be permanently fixed?
Yes, rising damp can be permanently fixed with proper treatment, typically by installing a chemical damp-proof course (DPC) and replacing affected plaster.
Long-term success depends on addressing moisture sources and using appropriate materials.
What is the cheapest way to fix rising damp?
The cheapest solution is usually DIY rising damp treatment using breathable paints and improving airflow.
However, without a proper DPC, these are temporary fixes. Long-term, professional damp-proofing is more cost-effective.
How do you fix rising damp DIY?
DIY treatment may involve removing affected plaster, applying a rising damp treatment cream, and re-plastering with a breathable mix.
Ensure the source of moisture (e.g., poor drainage or bridging) is addressed first.
Can you treat rising damp without removing plaster?
Only mild cases can be treated without plaster removal using damp-proof paints or injection creams.
However, if salts or moisture have deeply penetrated, removing and replacing the plaster is usually necessary.
What happens if rising damp is left untreated?
Left untreated, rising damp can cause structural damage, crumbling plaster, timber decay, and mould growth.
It also reduces insulation efficiency and can lead to health problems from indoor air quality issues.
Can damp dry out on its own?
Some minor damp issues can dry out if the source is fixed and the area is well-ventilated.
But rising damp typically requires active treatment to prevent ongoing moisture ingress from the ground.
What can be mistaken for rising damp?
Condensation, plumbing leaks, or penetrating damp can mimic rising damp symptoms.
A proper survey can help identify the true cause before starting treatment.
What is the difference between damp and rising damp?
“Damp” is a general term for excess moisture in buildings.
“Rising damp” specifically refers to ground moisture moving up through walls by capillary action, often requiring specialised treatment.