Key Takeaways
Key Takeaways
- Identify the cause of damp before treatment.
- Dry the wall completely before mending.
- Apply the correct treatment based on the nature of the damp.
- Ventilation, maintenance, and controlling humidity are the secrets to long-term prevention.
- Do not hesitate to call in the experts for serious or ongoing damp.
Wondering how to treat damp walls internally? Well, it isn’t just about improving the look of your home—it’s essential for protecting your property’s structure and your family’s health.
Whether you’re dealing with unsightly stains, peeling paint, mould, or that persistent musty smell, internal damp treatment offers practical solutions that target the root cause.
In this guide, we’ll show you how to identify the signs early and explore the most effective ways to tackle damp from the inside out.
See more from us👉How to Get Rid of Damp: A Professional Guide
What Causes Damp in Internal Walls?
Before you learn how to treat damp walls internally, you need to understand what’s causing the problem.
If the source isn’t fixed, the damp will keep coming back, even after treatment.
Below are the most common causes of damp in internal walls:
Penetrating Damp
- Resulting from the entry of water through the outer walls as a result of structural faults such as cracked brickwork, missing mortar, defective render, or broken guttering.
- It is seen as patches of localised damp that increase during wet weather.
Rising Damp
- Rising damp occurs when moisture in the ground rises through walls through capillary action, particularly where there is no functioning damp-proof course (DPC).
- Often affects lower sections of walls (up to 1 metre) and can present with white salt deposits or flaky plaster.
Condensation
- Occurs due to moisture in the air condensing onto cold surfaces, typically in kitchens, bathrooms, and poorly ventilated rooms.
- Produces black mould, particularly on cold spots, ceilings, or behind furniture.
Internal Leaks
- Resulting from leaking radiators, pipes, or appliances like washing machines.
- Damp tends to be sudden and localised around the area of the leak.
Tip:
Getting the type of damp wrong can result in lost time and money. Seek a professional survey for proper diagnosis.
Want more guidance on how to treat damp walls internally? Also read: How to Cure Rising Damp in an Old House
Step-by-Step Guide: How to Treat Damp Walls Internally
1. Find and Stop the Cause of Moisture
Always address the cause before treating the wall itself. Any damp treatment that is applied without fixing the source will not be a long-term success.
- Examine exterior walls, roofs, gutters, and downpipes for wear or leaks.
- Routine checks on indoor plumbing for drips around pipes, radiators, and water tanks.
- Save for areas with poor ventilation or condensation build-up.
- Check if there is a functional damp-proof course (DPC) (search for a line of brick or plastic membrane around 6 inches high at the ground level outside).
Example:
If damp only appears on one internal wall that is against the garden and gets worse after rainfall, it could be penetrating damp caused by ruined rendering.
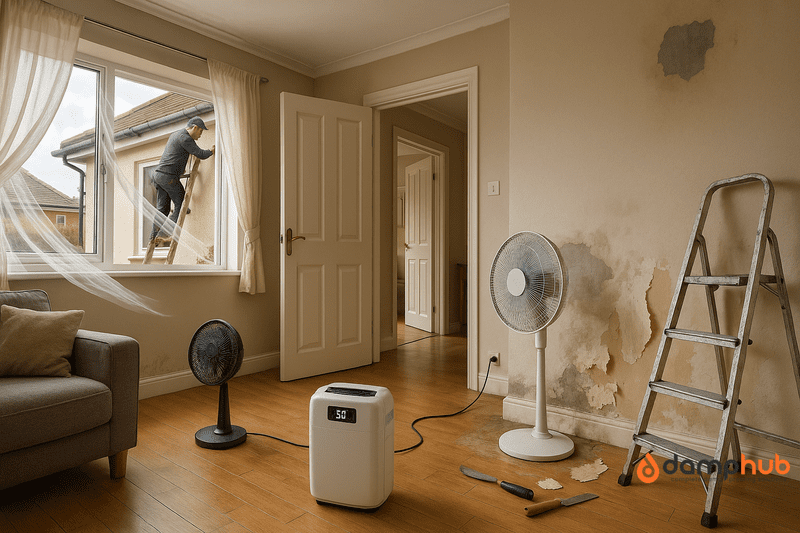
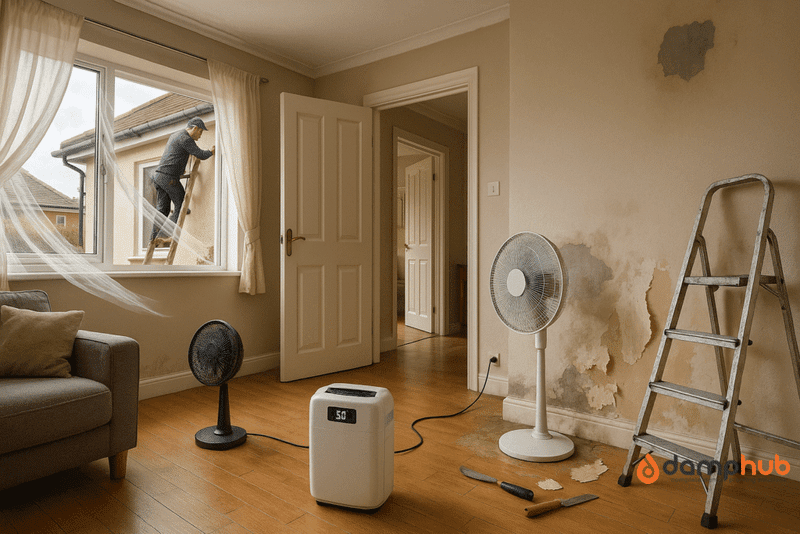
2. Let the Wall Dry Out Completely
Once the source of moisture is repaired, let the wall dry out naturally.
This is necessary before treatment or decoration.
- Take advantage of fans, heaters, or a dehumidifier to hasten drying (particularly in winter).
- This may take weeks to months, depending on the severity of the moisture.
Tip:
Use a moisture meter (which is to be found at most DIY centers) to check on the drying process.
👉 Must read: 10 Best Damp Survey Companies in London
3. Strip Back Damaged Materials
Defective or contaminated surfaces should be removed to achieve effective treatment.
- Strip off all peeling paint, bubbling paper, and salt-contaminated plaster.
- Knocked off any discernible mould using a mould-killing spray or fungicidal wash (always wear gloves and a mask).
- Dispose of spoiled material cautiously.
Good to Know:
Rising damp salt deposits are hygroscopic—they draw moisture from the air, so they need to be fully eliminated before replastering.
4. Use the Correct Damp Treatment
Select treatment by damp type:
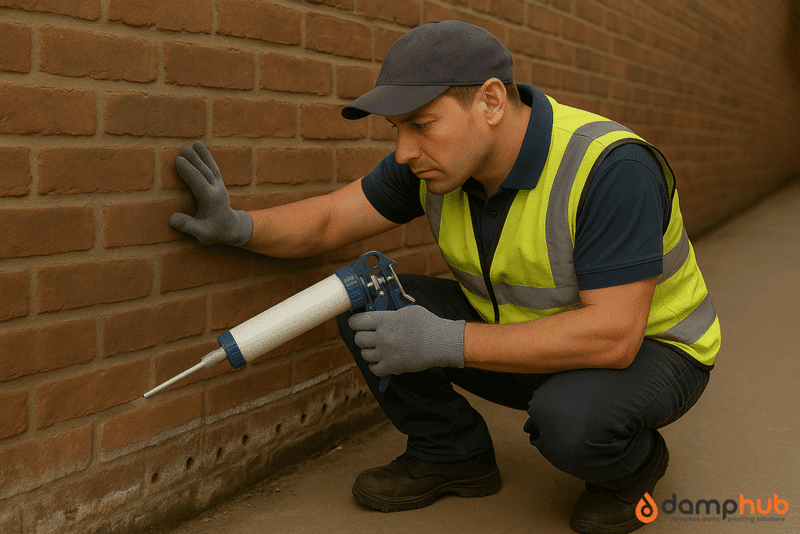
Penetrating Damp
- Seal the wall with water-repellent creams or paints (e.g., Stormdry).
- Repair any cracks or gaps in the exterior before applying sealants.
Rising Damp
- Drill holes at the bottom of the wall and inject a chemical damp-proof course (DPC).
- Leave the wall to dry before replastering with salt-resistant plaster.
- You may need to fit physical damp membranes behind new plasterboard as well. For more information, see our full guide on how to Treat Rising Damp: A Complete Guide for UK Homeowners
Condensation
- Enhance ventilation through trickle vents, extractor fans, or passive vents.
- Apply anti-condensation or anti-mould paint to internal walls.
- Dry out humidity through dehumidifiers or regular heating.
Leaks
- Get a plumber to fix any defective piping.
- Check using a moisture meter after repairs to verify it’s fixed.
👉 After reading our how to treat damp walls internally guide, make sure to also read 👉 Paint for Damp Walls in the UK
5. Replaster and Redecorate with Breathable Materials
After the wall has thoroughly dried and been treated:
- Replaster with water-resistant, breathable plaster (e.g., sand and cement render or specialist renovating plaster).
- Apply breathable emulsion paint. Avoid vinyl paints and wallpaper after treatment.
- Ventilate the room during and after decorating.
Tip:
Leave 4–6 weeks (or longer for rising damp) before repainting, depending on drying conditions.
How to Prevent Damp from Returning to Internal Walls
Now that you’ve learned how to treat damp walls internally, the next crucial step is making sure it doesn’t return.
Prevention is usually simpler—and far more cost-effective—than dealing with damp all over again. Here’s how to stop it from coming back after treatment:
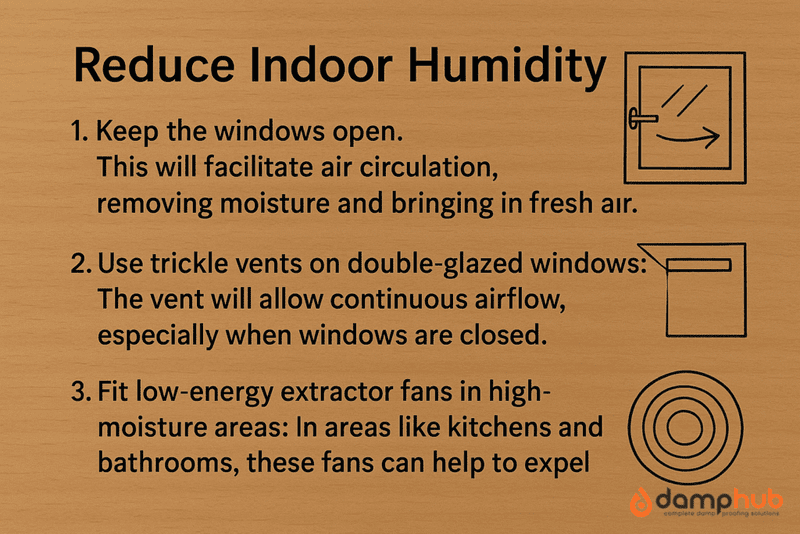
Improve Indoor Ventilation
- Install or employ extractor fans in bathrooms and kitchens.
- Leave internal doors open where practicable to provide ventilation.
- Open windows from time to time, even during winter, to expel moisture.
- Employ trickle vents or heat recovery ventilators (MVHR) for constant background ventilation.
Keep the Property Exterior in Order
- Inspect and mend cracks in brickwork, render, pointing, and guttering regularly.
- Ensure drainage systems (such as downpipes and gullies) are clear.
- Maintain flower beds and soil below the level of the DPC externally.
Controlling Humidity and Temperature
- Dry clothes outdoors, particularly not on radiators.
- Use a dehumidifier in rooms where damp is most likely.
- Maintain a consistent background temperature to avoid cold surfaces where condensation may occur.
See more resources Energy Saving Trust – Preventing Condensation and Damp
When to Call in the Professionals
Not all damp problems can—or should—be tackled with a DIY approach.
If you’ve tried basic remedies but the issue keeps coming back, or if you’re unsure how to treat damp walls internally in a safe and effective way, it’s time to bring in a specialist.
- If the damp reappears after treatment, it’s time to seek professional damp survey help.
- When treating rising damp, hire a PCA-accredited damp professional to guarantee proper treatment. Find out more on PCA – Find a Qualified Damp Specialist
- When you notice extensive black mould, particularly where children, the elderly, or asthma sufferers reside, act immediately.
- If you are a tenant, report damp to your landlord or local authority at the earliest.
👉 Must read: What is included in a Damp Survey?
Final Thought
Now that you understand how to treat damp walls internally, the next step is action. Don’t wait for damp to spread or worsen—it’s much easier (and cheaper) to tackle early.
If you’re unsure about the cause, get a professional damp survey to avoid wasting time and money on the wrong fix.
And once treatment is done, focus on prevention: ventilate rooms daily, keep humidity in check, and inspect your home seasonally for signs of returning damp.
A dry wall today means a healthier home tomorrow.
Quick Recap
- Damp is fixable — but only if the source is addressed first.
- Never rush the drying process after repairs.
- The right treatment depends on the type of damp.
- Good airflow and upkeep help stop it coming back.
- Persistent issues? It’s time to call in the pros.
How to Treat Damp Walls Internally: Your Common Questions Answered
How long does a damp wall take to dry out?
Drying time depends on the wall material, thickness, and how severe the damp issue is. On average, allow around one month per inch of wall thickness once the source of moisture has been fixed.
For example, a solid brick wall might take 2–3 months to fully dry. But if the damp is caused by something ongoing, like a leaking pipe or rising damp, the wall won’t dry out until that’s resolved.
How to tell if an internal wall is damp?
Look out for clear signs like peeling paint, tide marks, musty odours, mould growth, or patches that feel cold or damp to the touch.
You might also see bubbling plaster or salt deposits on the surface.
If in doubt, a moisture meter can help confirm it, but a professional inspection is the best way to understand what’s really going on behind the surface.
What is a normal moisture reading for internal wall?
A normal moisture reading for internal walls typically sits between 5% and 15%, depending on the material.
Readings over 20% often suggest a problem, especially if they’re consistent across multiple areas.
If moisture levels are high, it’s worth investigating further — and possibly exploring how to treat damp walls internally before things get worse.
Do you need a DPC on internal walls?
Not all internal walls need a damp-proof course (DPC), but if the wall is at ground level or backs onto an external wall, then yes, a DPC is essential.
Without it, rising damp can travel up from the ground and affect internal finishes.
Partition walls on upper floors, however, usually don’t require one unless there’s a specific moisture risk nearby.
What is the best way to treat damp walls internally?
The best approach depends on the type of damp. For condensation, improve ventilation and insulation. For penetrating damp, fix external defects like cracks or leaking pipes.
Rising damp usually requires installing a chemical DPC and re-plastering with breathable materials. In short, the best answer on how to treat damp walls internally starts with identifying the cause and fixing it at the source.
When should I worry about damp walls?
If you notice persistent damp patches, mould, peeling paint, or strong musty smells, it’s time to take it seriously.
Damp can lead to structural damage and health issues if left untreated.
It’s especially concerning when the problem returns even after repairs — that usually means the underlying cause hasn’t been properly addressed.
Can you sleep in a room with damp walls?
It’s not recommended. Damp walls can encourage mould, which can trigger respiratory problems, allergies, and skin irritation.
This is especially risky for children, the elderly, or anyone with asthma.
If the room is only slightly damp and being treated, it might be manageable short-term, but ideally, you should avoid sleeping there until it’s sorted.
Will a wet wall dry on its own?
A wet wall can only dry out on its own if the source of moisture has been stopped.
That means no more leaks, no more rising damp, and proper ventilation in place. Without fixing the root cause, the wall will stay damp, and possibly get worse.
Once the issue is resolved, natural drying can happen, but it often takes time.