Moisture doesn’t need a broken pipe or a flood to get in. It sneaks. It climbs. It soaks. And once it’s in your walls or floors, it sticks around — weakening plaster, rotting timber, and making rooms feel cold and musty.
Damp proofing is the system we use to stop that. But how it works — physically, chemically, practically — is something most homeowners never get told. Until a quote arrives, and it’s suddenly full of jargon like “DPC injection” and “membrane system with salt-neutralising render.”
This guide answers the question “how does damp proofing work?”, in plain English — covering the key methods like damp proof courses (DPC), damp proof membranes, and waterproof coatings, with honest advice on where each one fits in.
First, How Does Moisture Get into Your Home?
Before answering ‘how does damp proofing work’, it helps to understand how moisture gets into buildings in the first place. Nearly all damp problems fall into one of these categories:
- Rising Damp: Moisture is drawn upwards from the ground through bricks or mortar by capillary action. Like a sponge sitting in water. See our full guide 👉 What Does Rising Damp Look Like?
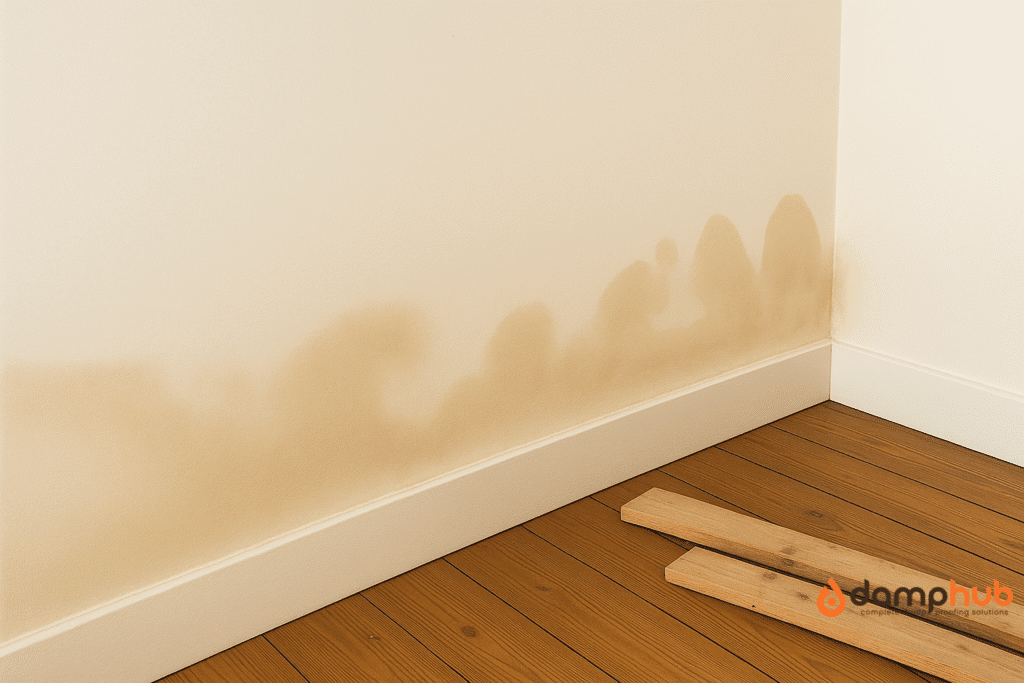
- Penetrating Damp: Moisture soaking sideways through walls, roofs, or around windows — usually due to rain, leaks, or porous materials.
- Condensation: Moisture in the air turns into water droplets on cold surfaces — typically caused by poor ventilation or insulation.
Each of the above types of damp requires a different damp proofing approach. Now let’s explore the main systems and how they work to stop moisture in its tracks.
What Is Damp Proofing?
Damp proofing is the process of preventing moisture from entering or staying in parts of a building where it can cause damage. It’s not always about full waterproofing. It’s about controlling moisture — blocking it where needed, and letting it escape where possible.
It’s a system, not a single product. It also needs to work in conjunction with your property’s materials, structure, and ventilation.
👉 See our full guide: How to Damp Proof a House: 7 Practical Tips from Industry Experts
What Are The Different Types of Damp Proofing?
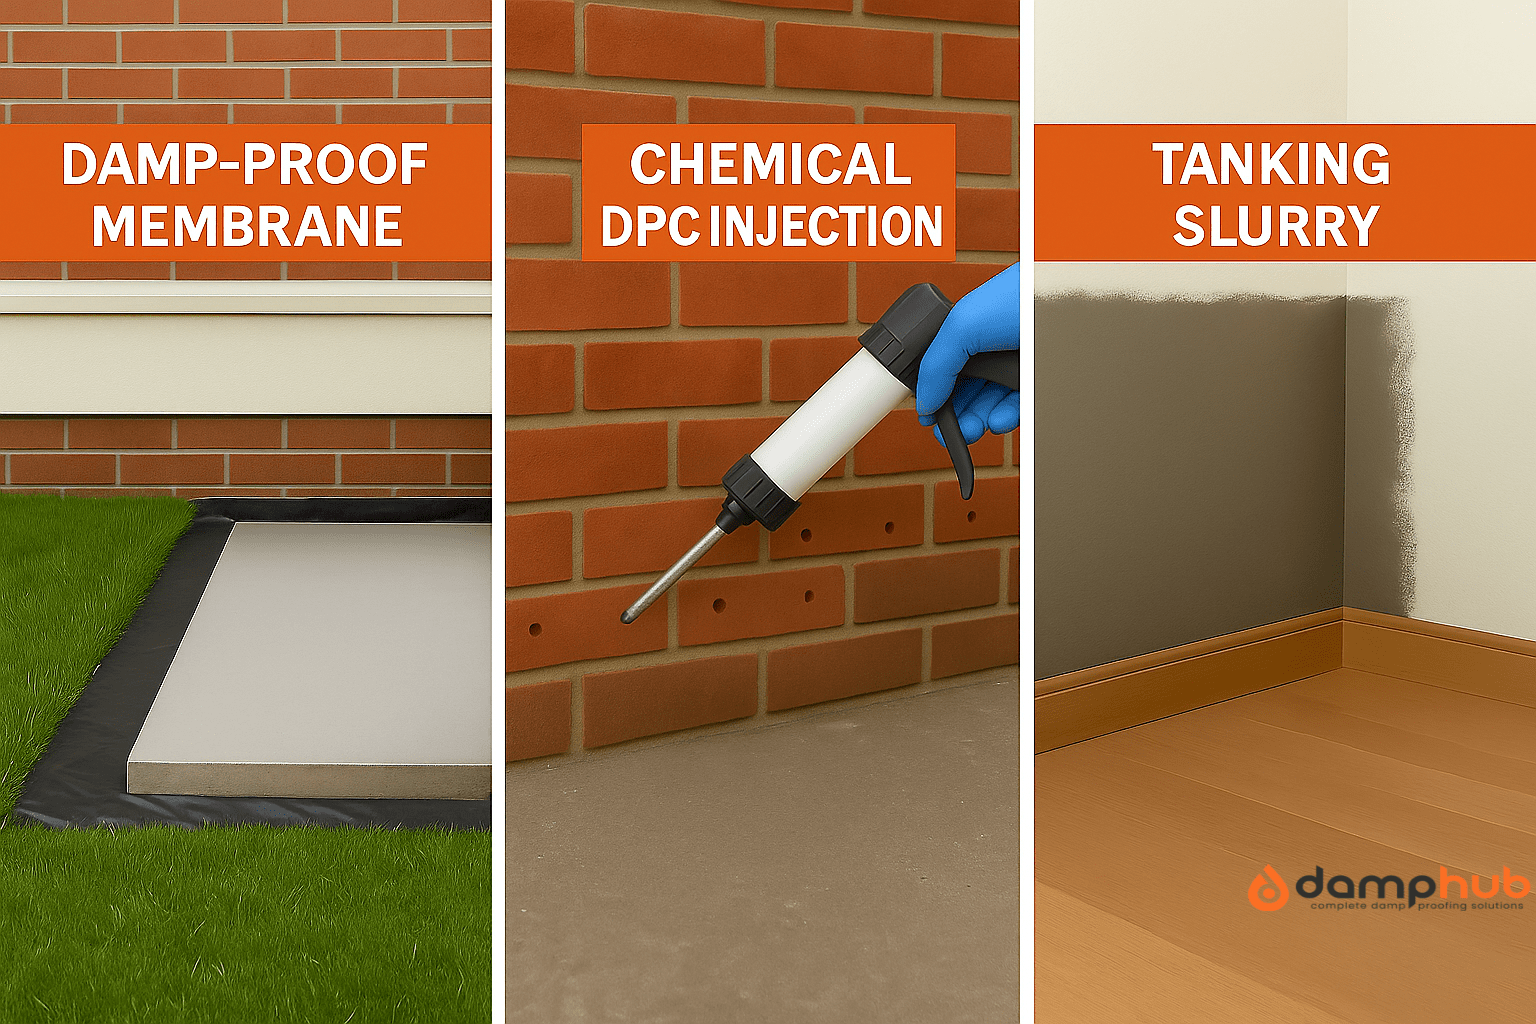
1. Chemical Damp Proof Course (DPC): Overview
Chemical DPCs are injected into walls to stop rising damp — a fix for older properties that either lack a damp proof course or have one that’s failed. They’re one of the most common retrofit solutions for ground-floor moisture problems.
How a Chemical DPC Works
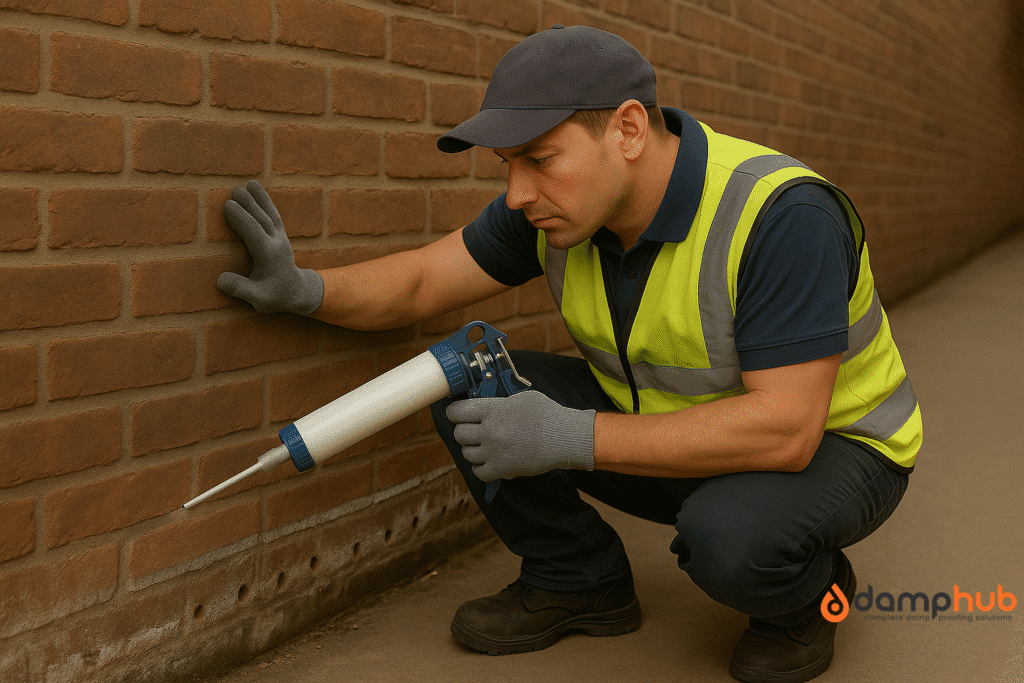
A cream or liquid is injected into drilled holes along a horizontal mortar bed. It soaks into the masonry, cures, and forms a water-repellent layer that stops moisture from rising.
Where Chemical DPC Is Used
- Brick walls affected by rising damp
- Ground-floor masonry with no existing DPC
- Heritage buildings (with care and proper assessment)
What Chemical DPC Is Made Of
- Silane/siloxane-based cream (e.g. Dryzone, Permaguard, Kiesol C)
- Solvent-free liquid DPCs for dense materials
- Often paired with salt-inhibiting renders
Pros and Cons of Chemical DPC
Pros:
- Non-invasive compared to physical DPC
- Quick to install
- Cost-effective for targeted areas
Cons:
- Won’t work in saturated walls
- Needs follow-up plastering
- Poor results from DIY kits
Limitations of Chemical DPC
- Doesn’t fix penetrating or lateral damp
- Requires good wall porosity
- Not suitable if external ground levels are too high
Installation Tips for Chemical DPC
- Drill at consistent height and spacing
- Inject into dry or slightly damp mortar only
- Always replaster using salt-resistant systems
💡 Pro Tip:
Chemical DPCs only work when the wall is dry enough to absorb it and when followed by correct salt-neutralising plaster.
2. Damp Proof Membranes (DPM): Overview
DPMs are plastic sheet barriers used to block moisture coming through floors or walls. You’ll find them under concrete slabs or behind dry-lining where there’s ongoing damp but no practical way to stop water at the source.
How Damp Proof Membranes Work
They block moisture from passing through from below or behind, creating a dry surface for finishes like plaster or flooring. In basements, they often feed into drainage systems.
Where Damp Proof Membranes Are Used
- Under concrete floors
- Behind dry-lining on damp walls
- As part of cavity drainage systems in basements
What Damp Proof Membranes Are Made Of
- Polythene sheets for ground floors
- HDPE studded cavity membranes (Delta MS500, Platon, Oldroyd)
- Rubber-based membranes for complex jobs
Pros and Cons of Damp Proof Membranes
Pros:
- Long-lasting and highly durable
- Allows for dry finishes over damp structures
- Works with other systems like sump pumps
Cons:
- Doesn’t stop damp — just hides it
- Must be installed carefully to avoid bridging
- It can trap moisture if not drained properly
Limitations of Damp Proof Membranes
- Not a fix for the damp source
- Needs proper sealing and overlaps
- Should be connected to the wall DPC where relevant
Installation Tips for Damp Proof Membranes
- Prepare surfaces: clean, flat, debris-free
- Seal overlaps and joints fully
- Ensure drainage path (if part of a cavity system)
👉 Must read: What is the Difference Between DPC vs DPM?
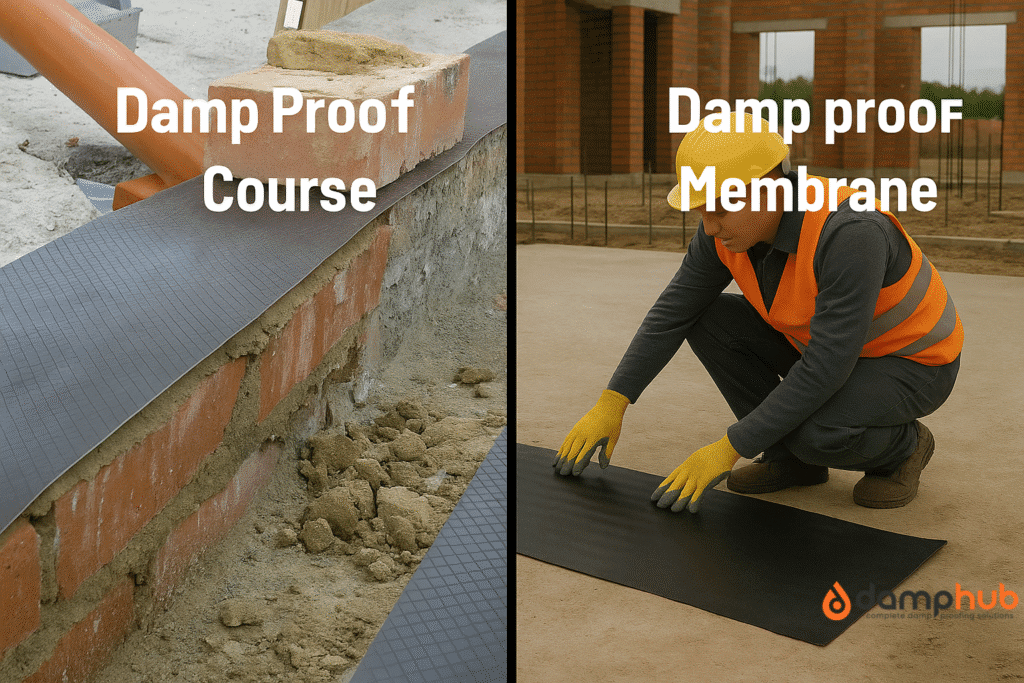
🟠 Good to Know:
DPMs don’t cure damp — they just manage it. If moisture is still behind the wall, the problem isn’t fixed, just contained.
3. Tanking Slurry Coatings: Overview
Tanking involves coating walls or floors with a waterproof slurry that physically prevents damp from pushing through. It’s most often used in basements, cellars, or below-ground spaces.
How Tanking Slurry Works
The masonry is coated with cement-based slurry (e.g. Vandex, Sika, KA Tanking). Once cured, it forms a dense waterproof layer that resists hydrostatic pressure and blocks water entry.
Where Tanking Slurry Is Used
- Basement walls and floors
- Below-ground utility rooms or cellars
- Retaining walls in contact with soil
What Tanking Slurry Is Made Of
- Cementitious waterproof coatings
- Slurry mixes often contain waterproofing additives or polymers
Pros and Cons of Tanking Slurry
Pros:
- Cheaper than full cavity membrane systems
- Effective where access outside is limited
- Blocks water completely
Cons:
- Rigid: can crack if the wall moves or salts expand
- Not breathable — traps moisture
- Doesn’t fix condensation or internal leaks
Limitations of Tanking Slurry
- Fails on unstable or salty walls
- Relies on surface preparation
- Not suitable alone for high water pressure
Installation Tips for Tanking Slurry
- Remove old coatings and loose material
- Dampen walls before application
- Combine with sump drainage for basements
🛠️ Try This:
Don’t rely on tanking slurry alone in high water areas — always add a sump pump or external drainage if needed.
4. Cavity Drain Membranes: Overview
Cavity drain membranes don’t block water — they manage it. These studded plastic sheets create a gap behind finished walls, allowing moisture to flow harmlessly to a drain or sump.
How Cavity Drain Membranes Work
Moisture passes through the wall but flows freely in the air gap behind the membrane. A perimeter drain collects it and redirects it to a sump pump or soakaway.
Where Cavity Drain Membranes Are Used
- Full basement conversions
- Heritage buildings (where altering walls is not allowed)
- Internal waterproofing where tanking is unsuitable
What Cavity Drain Membranes Are Made Of
- Studded HDPE sheeting
- Drainage channels (e.g. Aquachannel)
- Sump pumps with alarms or battery backups
Pros and Cons of Cavity Drain Membranes
Pros:
- Works with the natural movement of water
- Doesn’t rely on sealing the wall
- Easy to maintain with service hatches
Cons:
- Needs regular inspection
- Installation must be precise
- Higher upfront cost
Limitations of Cavity Drain Membranes
- Not suitable without drainage
- Requires space behind the wall finish
- Pumps need power and maintenance
Installation Tips for Cavity Drain Membranes
- Always install a perimeter drain
- Test and service sump pumps annually
- Include inspection points to clear blockages
More from us: Damp Proof Materials Guide
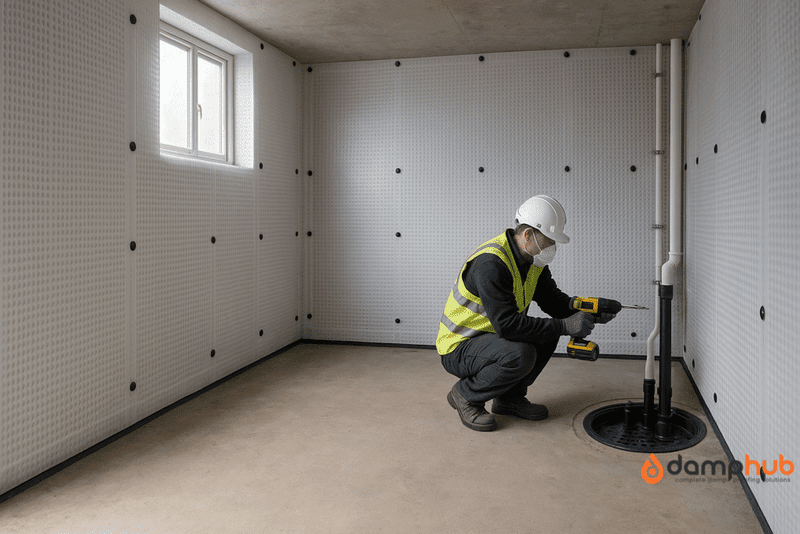
🟠 Good to Know:
These systems are brilliant for managing water — but they’re not maintenance-free. You’ll need access points and regular pump checks.
5. External Waterproofing: Overview
External waterproofing stops moisture before it even reaches the structure. It’s a proactive approach used on below-ground walls by applying barriers and managing drainage on the outside.
How External Waterproofing Works
Waterproof coatings or membranes are applied to the outside of basement or retaining walls. Paired with drainage boards or French drains, they stop water before it touches masonry.
Where External Waterproofing Is Used
- New builds with basement levels
- Retrofit basement repairs (with dig access)
- Retaining walls next to sloped ground
What External Waterproofing Is Made Of
- Bitumen or rubber-based coatings
- Peel-and-stick membrane sheets
- Drainage boards and geotextile membranes
Pros and Cons of External Waterproofing
Pros:
- Keeps building fabric dry
- Stops pressure and water at the source
- Ideal for new builds or major renovations
Cons:
- Requires excavation
- High cost for retrofit
- Doesn’t stop internal leaks or condensation
Limitations of External Waterproofing
- Not always possible in built-up areas
- Soil and backfill must be managed properly
- Labour-intensive installation
Installation Tips for External Waterproofing
- Pair with perimeter drainage (e.g. French drains)
- Use protective boards against sharp backfill
- Seal joints and overlaps tightly
👉 Please also read our Damp Proofing Advice for Homeowners
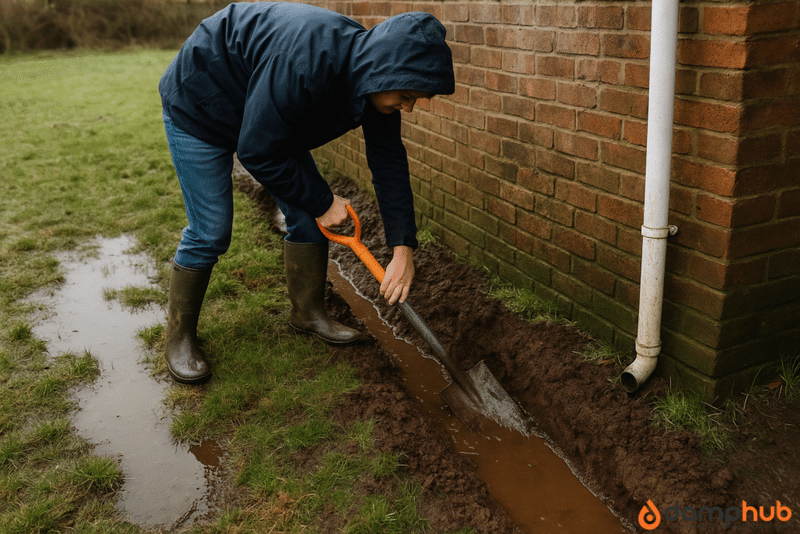
💡 Pro Tip:
External tanking won’t fix internal moisture problems like condensation — but it’s excellent for stopping soil moisture at the source.
6. Salt-Resistant Plaster: Overview
Salt-resistant plaster is used after damp treatment to stop residual salts from ruining your walls again. It creates a breathable but protective layer that prevents flaking, powdering or stains.
How Salt-Resistant Plaster Works
Salt-inhibiting base coats (like Dryzone or Renderguard) are applied, then topped with breathable plaster. This traps residual salts and prevents damage as walls dry out.
Where Salt-Resistant Plaster Is Used
- After installing a chemical DPC
- On previously damp internal walls
- In areas with hygroscopic salt staining
What Salt-Resistant Plaster Is Made Of
- Additive-treated base coats
- Lime or cement-based breathable plaster
- Mesh layers to prevent cracking
Pros and Cons of Salt-Resistant Plaster
Pros:
- Stops damp signs from reappearing
- Allows walls to dry out gradually
- Breathable and decorative finish
Cons:
- Needs proper prep and drying time
- Won’t work if the moisture source is still active
- Can be misapplied if rushed
Limitations of Salt-Resistant Plaster
- Not a replacement for DPC or tanking
- Surface must be clean and sound
- Requires multiple layers and curing time
Installation Tips for Salt-Resistant Plaster
- Hack off all old plaster first
- Let the wall dry as needed before re-coating
- Always apply approved salt-resistant render
👉 Find out: What Is the Best Method of Damp Proofing?
💡 Pro Tip:
Don’t ignore salt-resistant replaster. Why? Damp signs may return even when walls are technically dry.
7. Ventilation Systems for Damp Control: Overview
Modern ventilation systems reduce airborne moisture before it becomes a damp problem. From PIV units to extractor fans, they help control condensation, mould, and humidity.
How Ventilation Systems Work
Dry air is introduced or moist air is expelled to lower humidity levels. Systems range from passive wall vents to powered units with heat recovery.
Where Ventilation Systems Are Used
- Bathrooms and kitchens (high humidity zones)
- Lofts and roof spaces
- Bedrooms with poor air movement
What Ventilation Systems Include
- Positive Input Ventilation (PIV) units
- Humidity-sensing extractor fans
- Trickle vents in windows
- Passive air bricks or wall vents
Pros and Cons of Ventilation Systems
Pros:
- Prevents mould and condensation
- Improves indoor air quality
- Often low running cost
Cons:
- Doesn’t stop water ingress
- Needs maintenance (e.g. filters, fans)
- Limited effect if the insulation is poor
Limitations of Ventilation Systems
- Not suitable as a standalone damp fix
- Can struggle in very humid homes
- Needs constant airflow to be effective
Installation Tips for Ventilation Systems
- Use humidity-triggered fans where possible
- Check airflow paths (intake vs exhaust)
- Monitor humidity with a hygrometer
Read this article if you need damp proofing: 10 Best Damp Proofing Specialists in Swindon, UK

🛠️ Try This:
If your humidity is above 60% RH regularly, consider upgrading your ventilation or adding a PIV unit.
Which System Works Best?
You asked, “How does damp proofing work?” and we answered. Now let’s compare the different damp proofing methods and help you determine the best.
It depends entirely on what’s causing your damp:
| Cause of Damp | Best Method |
|---|---|
| Rising damp | Chemical DPC + salt-resistant plaster |
| Penetrating damp | External waterproofing + breathable coatings |
| Condensation | Ventilation + insulation + lifestyle changes |
| Basement water ingress | Cavity drain membrane system + sump pump |
| Floor damp | DPM under slab + insulation + linked wall DPC |
There’s no universal fix. A good installer will always diagnose the source before recommending the solution.
Need quick help? Top 10 Best Damp Seal Paints in the UK (2025 Buyer’s Guide)
Final Thoughts: How Does Damp Proofing Work?
It’s easy to think of damp proofing as something you buy: a tube of cream, a roll of membrane, a bucket of slurry. But in reality, it’s a strategy — made up of materials, methods and experience.
It works when:
- The source of moisture is correctly identified
- The right system is chosen for your property
- Materials are installed and connected properly
- Ventilation and drying time are factored in
And it fails when:
- You treat symptoms instead of the cause
- Materials are misused or skipped
- It’s rushed or done by guesswork
Because in the end, damp isn’t fussy. It’ll exploit the first gap, crack or shortcut it finds.
How Does Damp Proofing Work: Questions Answered
-
Does damp proofing really work?
Yes, but only when it’s matched to the correct type of damp. For example, rising damp needs a chemical DPC or physical barrier, while condensation needs better ventilation. If misdiagnosed or badly installed, damp proofing often fails.
-
Can you inject damp proof cream into the brick?
Yes. Most damp proof creams are formulated specifically for injection into brick or mortar joints. You drill holes along a mortar course, then fill them with cream to create a water-repellent barrier.
-
How long does damp proof cream take to work?
It usually takes 2 to 6 weeks to fully cure and start blocking moisture. Drying times vary depending on wall thickness, moisture levels, and ventilation.
-
How do you know if your damp-proof course has failed?
Signs of failure include:
– Damp patches or tide marks near skirting level
– Peeling paint or blown plaster
– Salty white deposits on the wall
– Persistent musty smells in lower rooms -
Do internal walls need damp proofing?
They can, if they’re affected by rising damp from below, lateral damp from an adjacent wall, or old plaster contaminated by salts. In cavity walls, damp from outer walls can track to inner ones if not stopped.
Find more info on our other post: How to Treat Damp Walls Internally: A Step-by-Step Guide
-
Can you inject damp proofing yourself?
Yes, with a DIY injection kit — but success depends on correct drilling, spacing, and identifying the right course. If walls are saturated, misaligned, or have structural issues, it’s best left to a professional.
-
How much to inject damp proof course?
DIY kits start from around £60–£150, but pro treatment ranges from £300 to £800 per wall, including materials and replastering. Costs rise if multiple walls or specialist finishes are needed.
Read our full guide: How Much Does Damp Proofing Cost?
-
How much damp proof cream do I need?
As a rule:
– 1 litre of cream covers about 6–8 metres
– A 5L tub treats 30–40 metres of wallThis varies based on wall thickness and the number of drilled holes (usually spaced 100–120mm apart).
-
How do I know if my house needs damp proofing?
Check for:
– Persistent damp near floor level
– Mould or mildew in corners
– Peeling wallpaper or soft plaster
– A damp, musty smell that doesn’t go away
A damp survey is the best way to confirm the cause before starting any treatment. -
How long does damp proof last?
Chemical DPCs typically last 20–30 years, sometimes longer. Many come with 25–40-year guarantees, but longevity depends on correct installation and whether the walls are properly replastered afterwards.

